# Initialize git
git init

# Create .gitignore
touch .gitignore

# Create README.md
touch README.md

# Check git status
git status

# Add all files in the directory to staging area recursively
git add .

# Check git status
git status

# Make initial commit
git commit -m "Initial commit."

# Authenticate GitHub
gh auth login

# Create a remote repository
gh repo create

# Set path to existing local repository when prompted
?Path to local repository (.) /PATH/TO/LOCAL/REPO

# Push existing local repository
git push9 Introduction to Visual Studio Code
9.1 Description
This session will cover an introduction to using Visual Studio Code (VS Code). VS Code has many features and functions that we will not have time to cover in this introductory session. It is very versatile and used by developers and computational biologists alike. We encourage you to explore in your own time and consider using VS Code as an additional tool in you computational kit.
9.1.1 What is VS Code?
VS Code is a commonly used code editor that incorporates many of the same features as RStudio, but allows for additional functionalities such as debugging, extensions, and version control interfacing.
What we love about VS Code - one place for everything!
VS Code allows you to create new projects and files, switch between coding languages, create, edit, debug, push, pull, and version control code all from one place.
Some common vocabulary:
- Code editor = a text editor program that is designed for editing source code and can identify code elements and errors in real time.
9.1.2 Initialize a project in VS Code
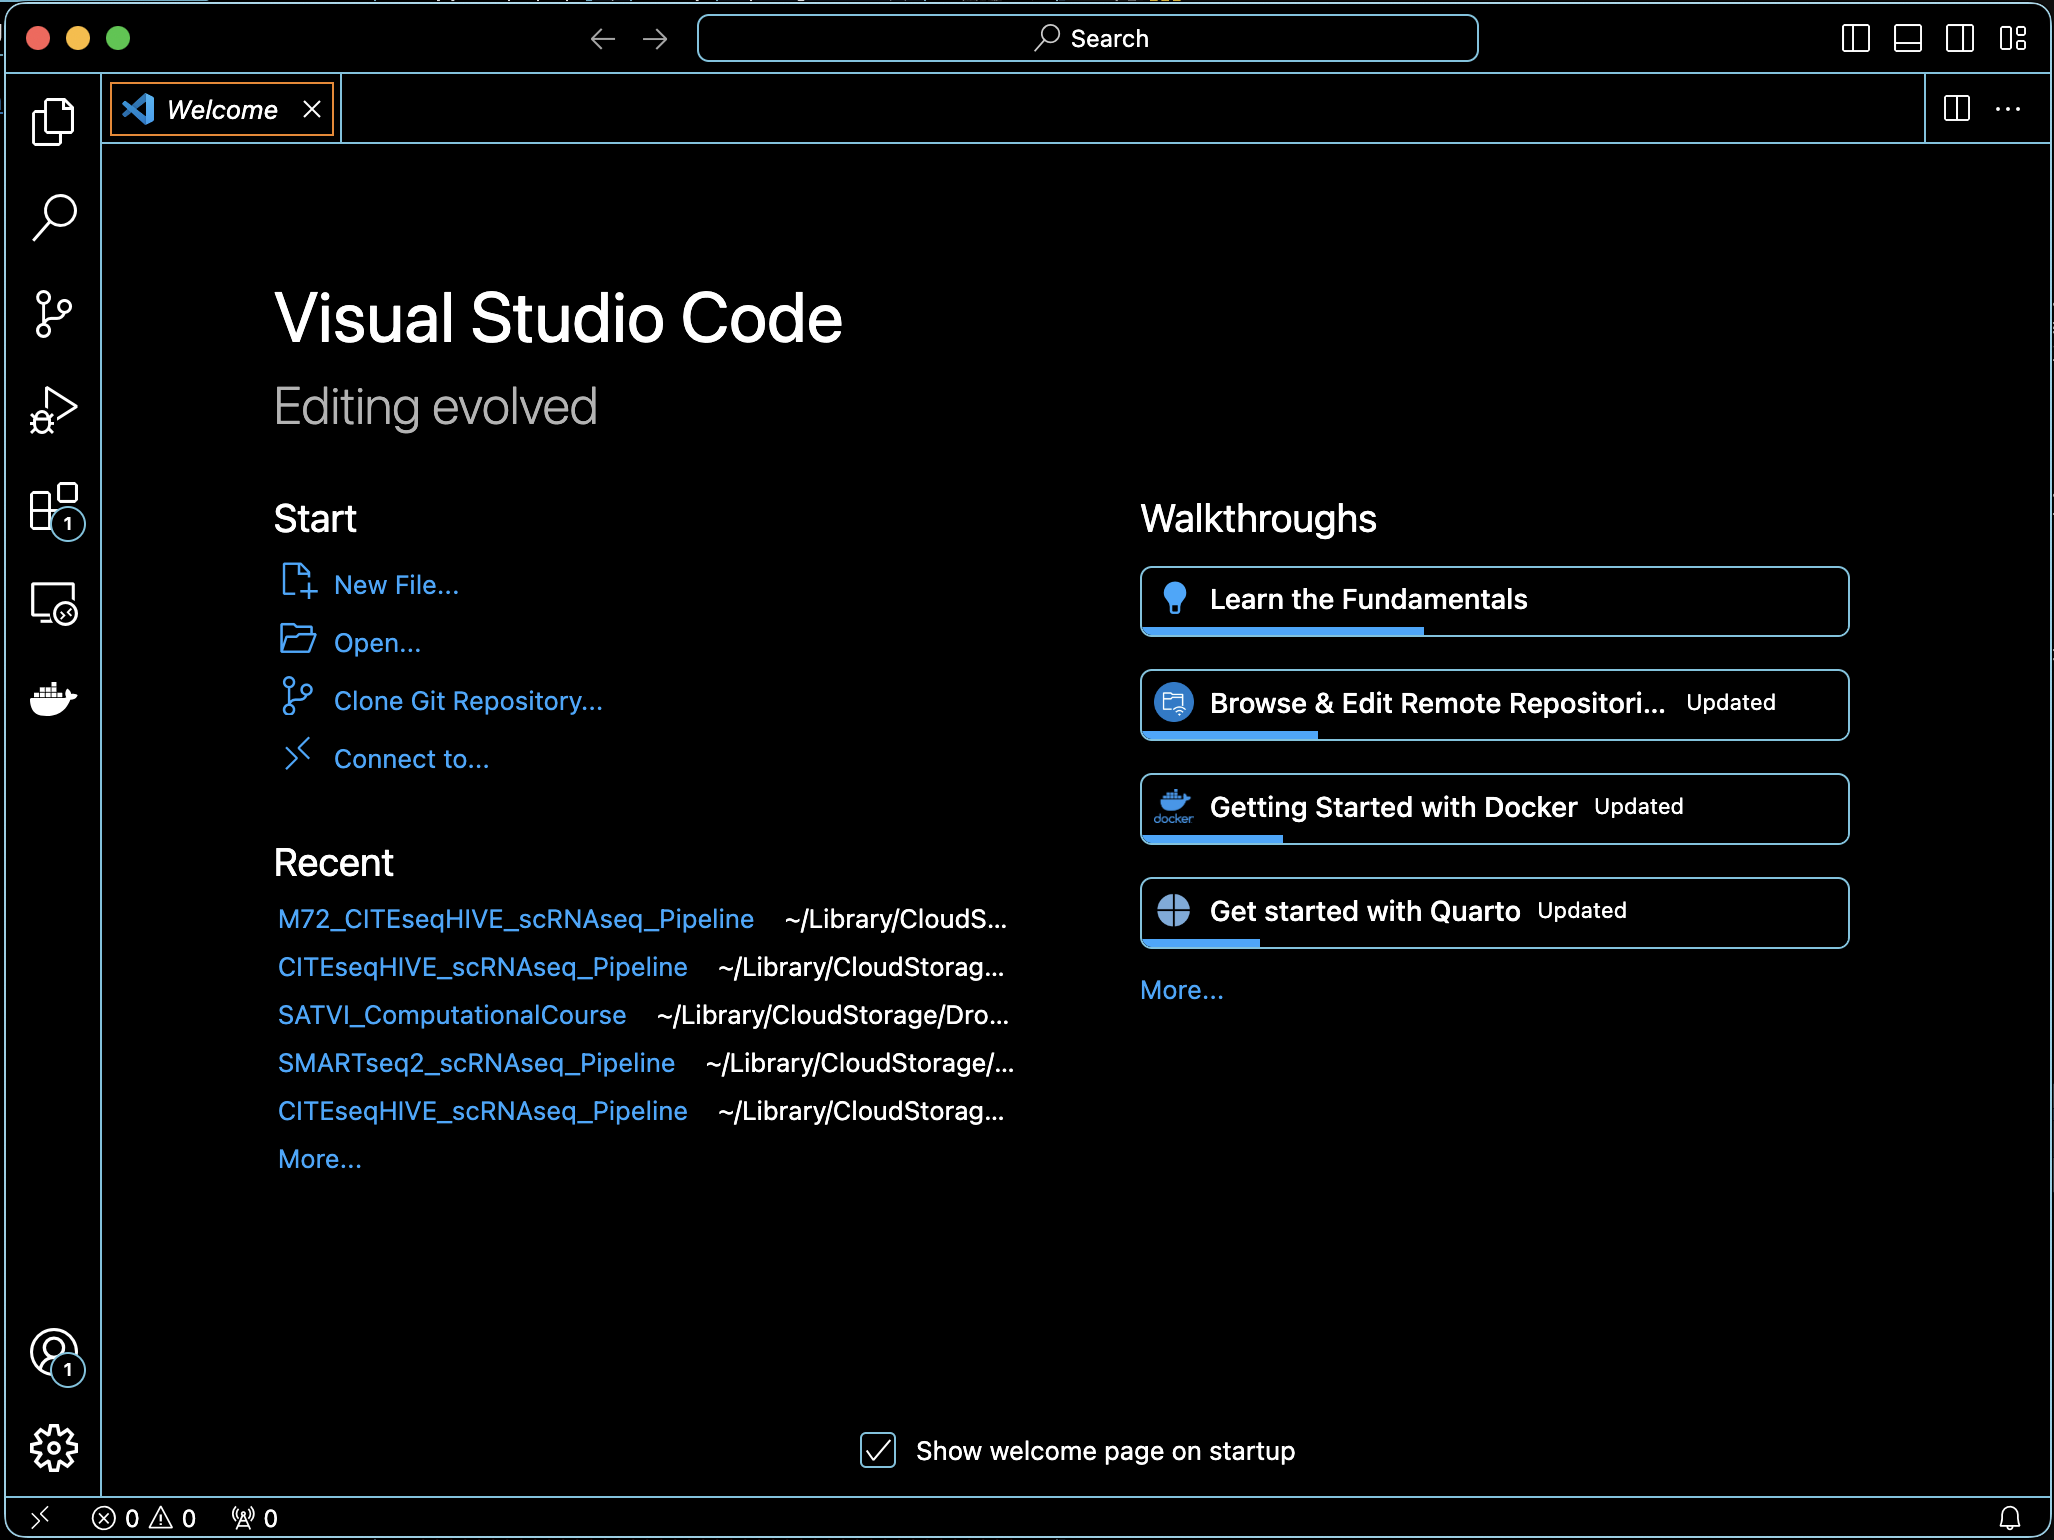
Open the VS Code desktop application. You should see the VS Code “Welcome” page.
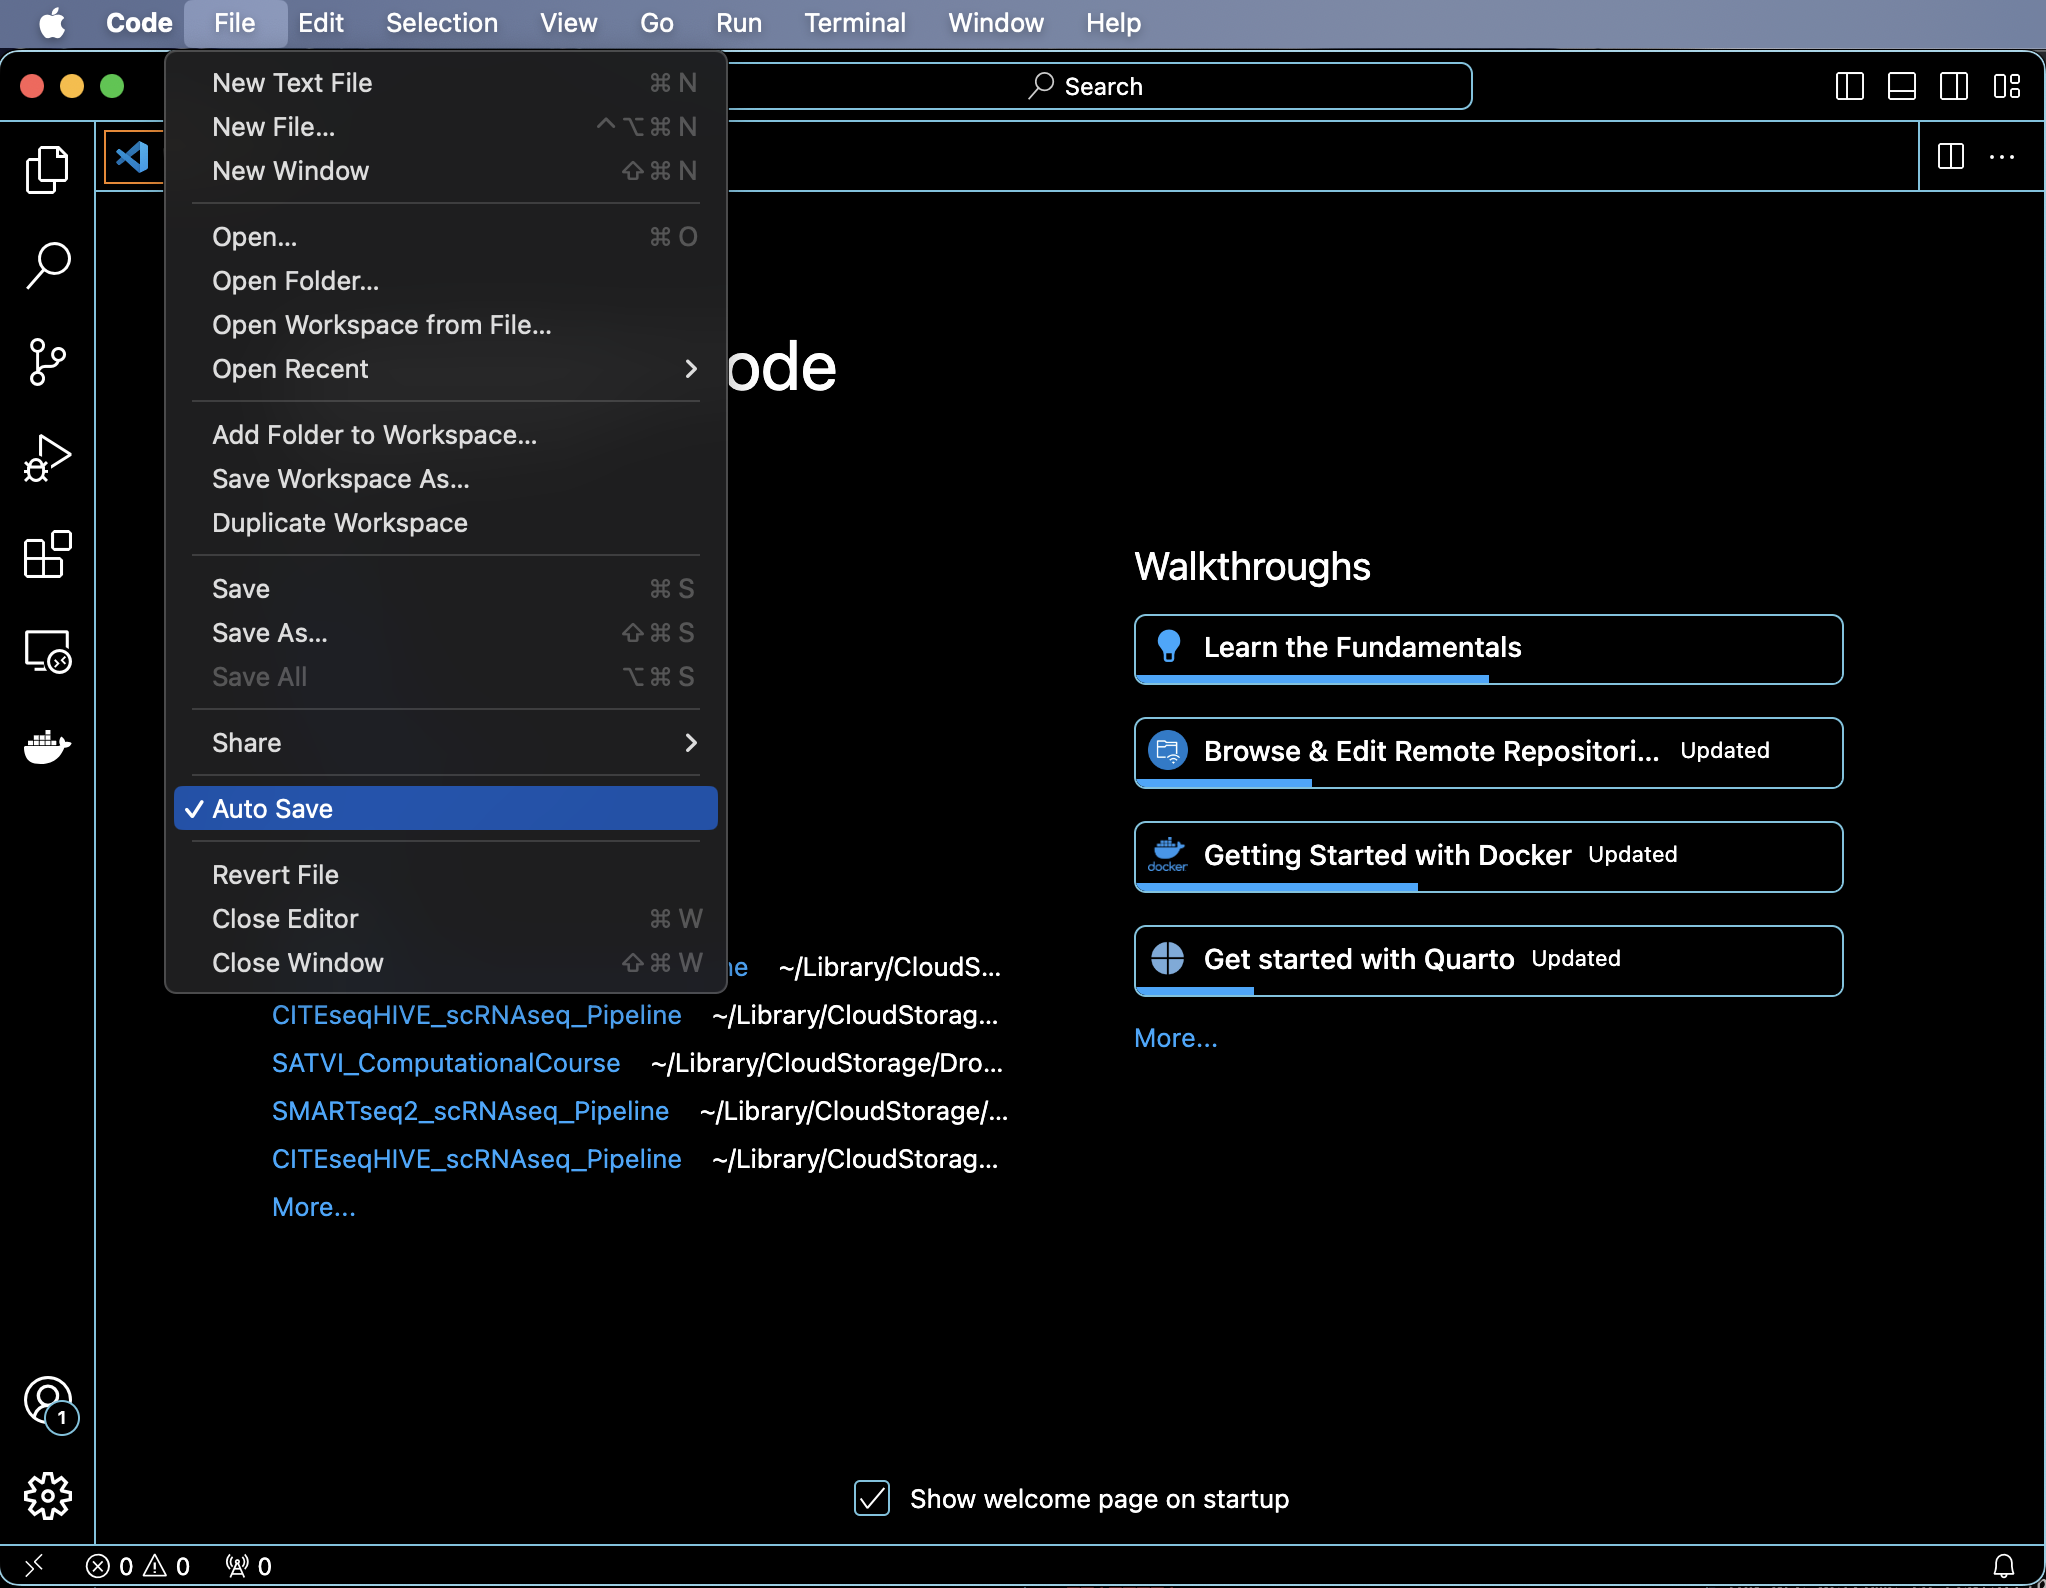
From the Welcome page, you can create a new file, open an existing or recent project or file, clone a git repository, or connect to a remote development workspace. These options can also be found under the “File” tab.
The Welcome page also contains liks to helpful “Walkthroughs” which provide tutorials for tasks and functionalities you might find useful while you develop your code.
Today we will create a new Quarto project, add files, and initialize git, and push to GitHub.
- Consider checking “Auto Save”
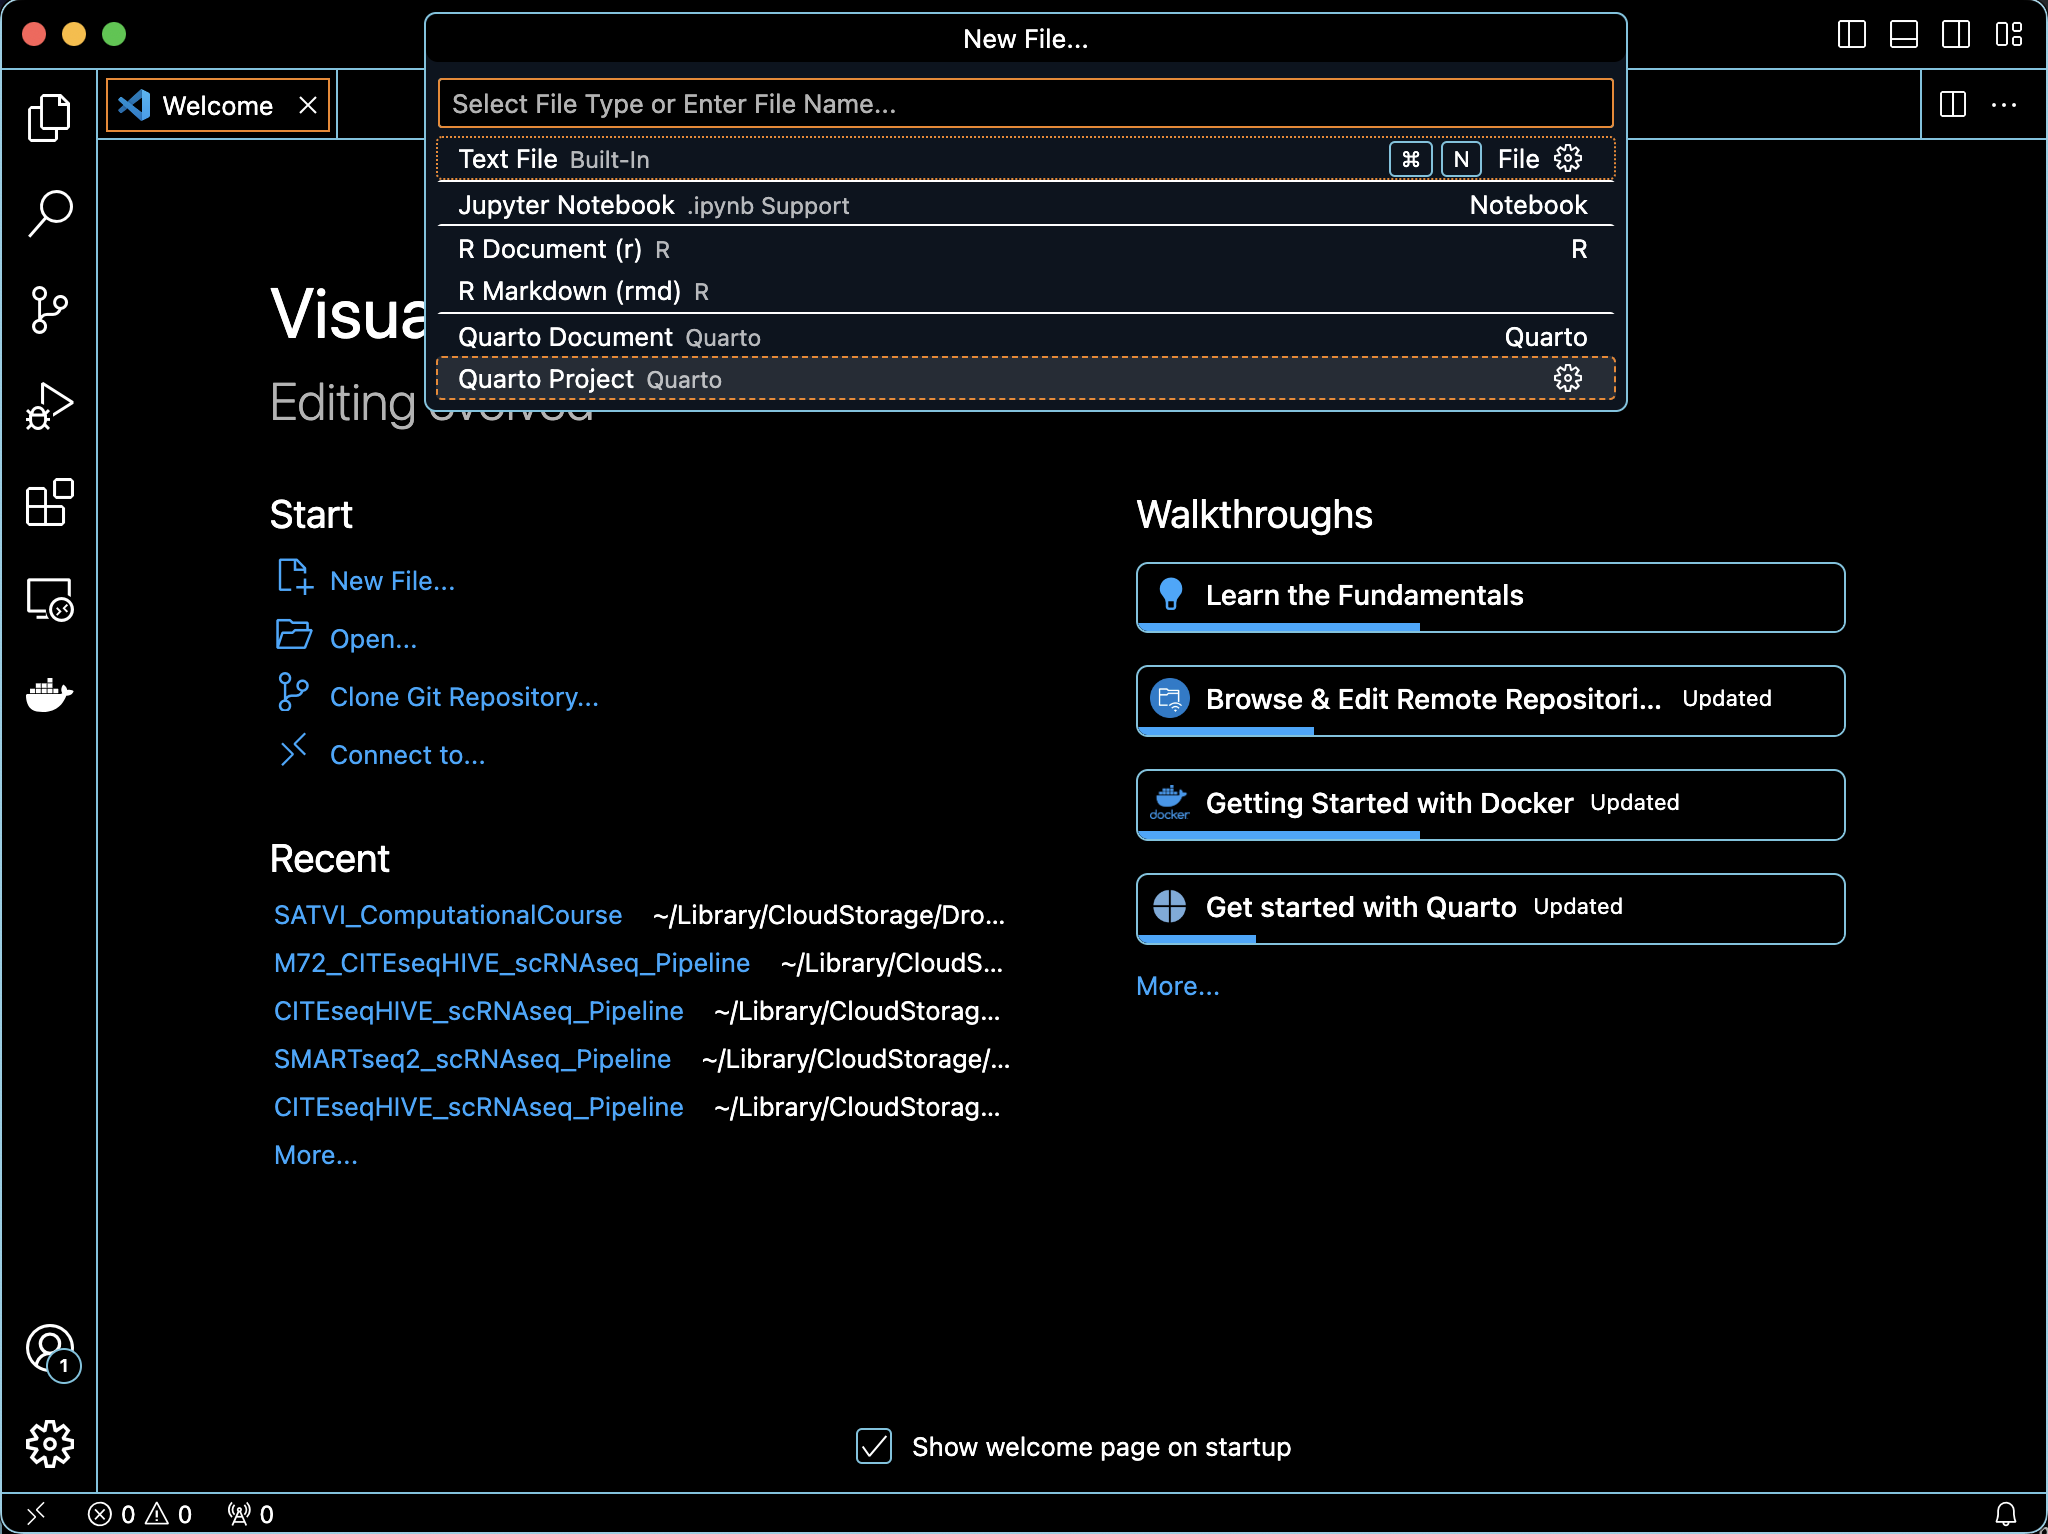
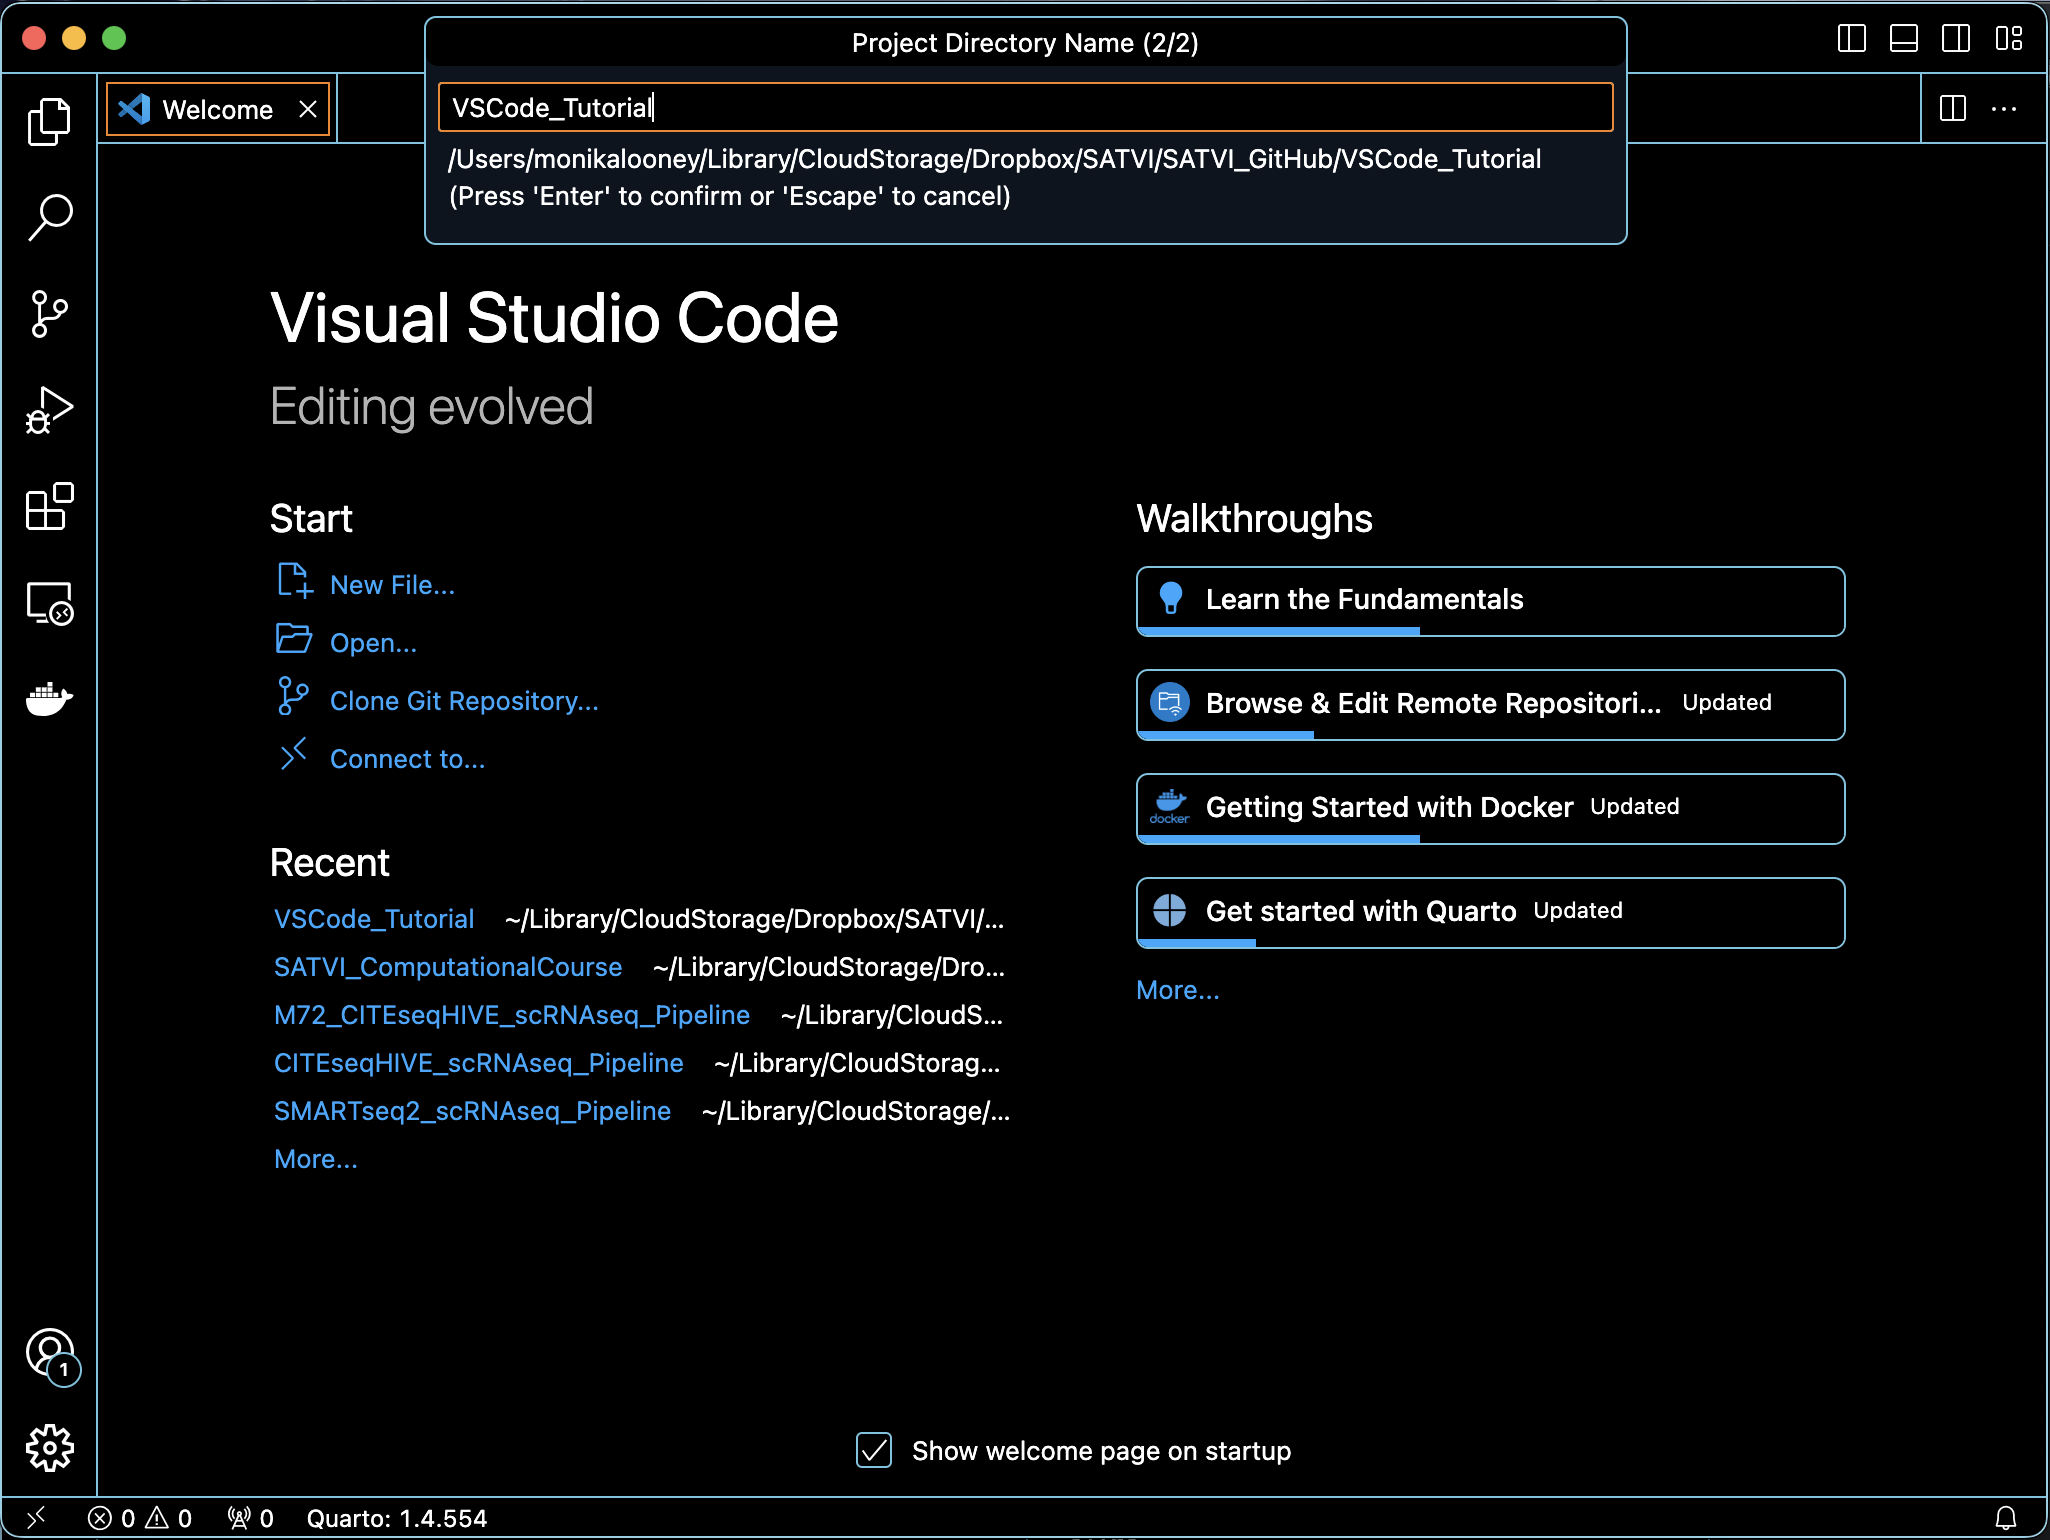
Create a new Quarto project
- When you click “New File”, a pop-up will open where you can select the type of file you want to generate. We will select “Quarto Project”
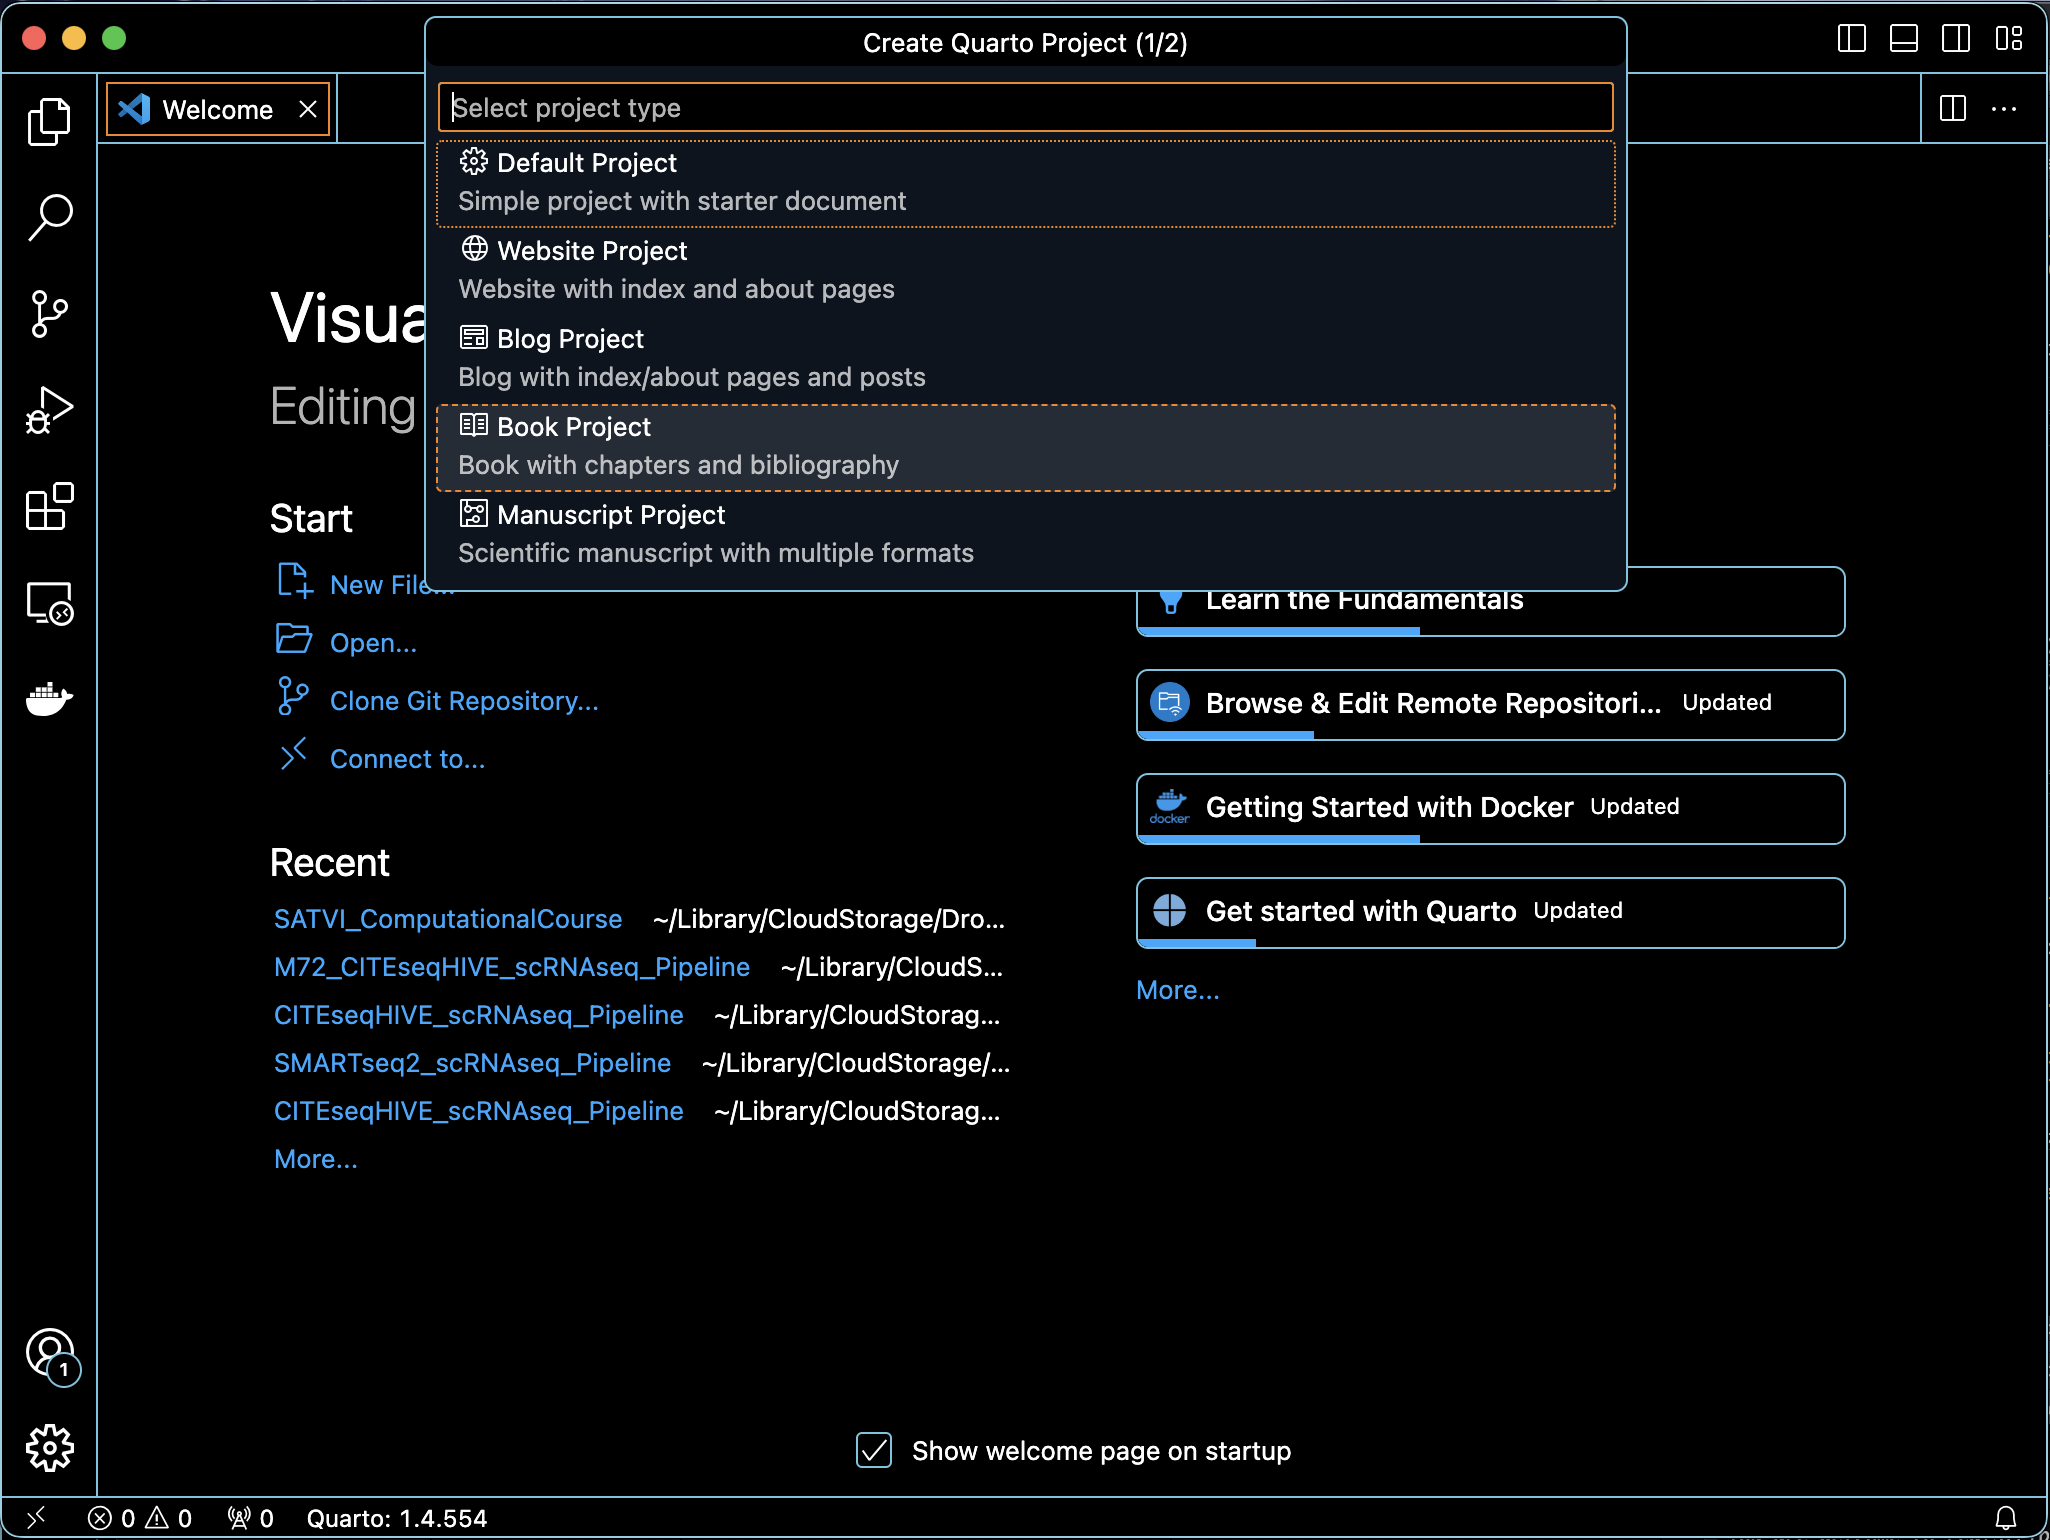
- Next select the type of project you will want to create. We will create a Quarto Book.
- Select the directory where you want to save your project and give it a name.
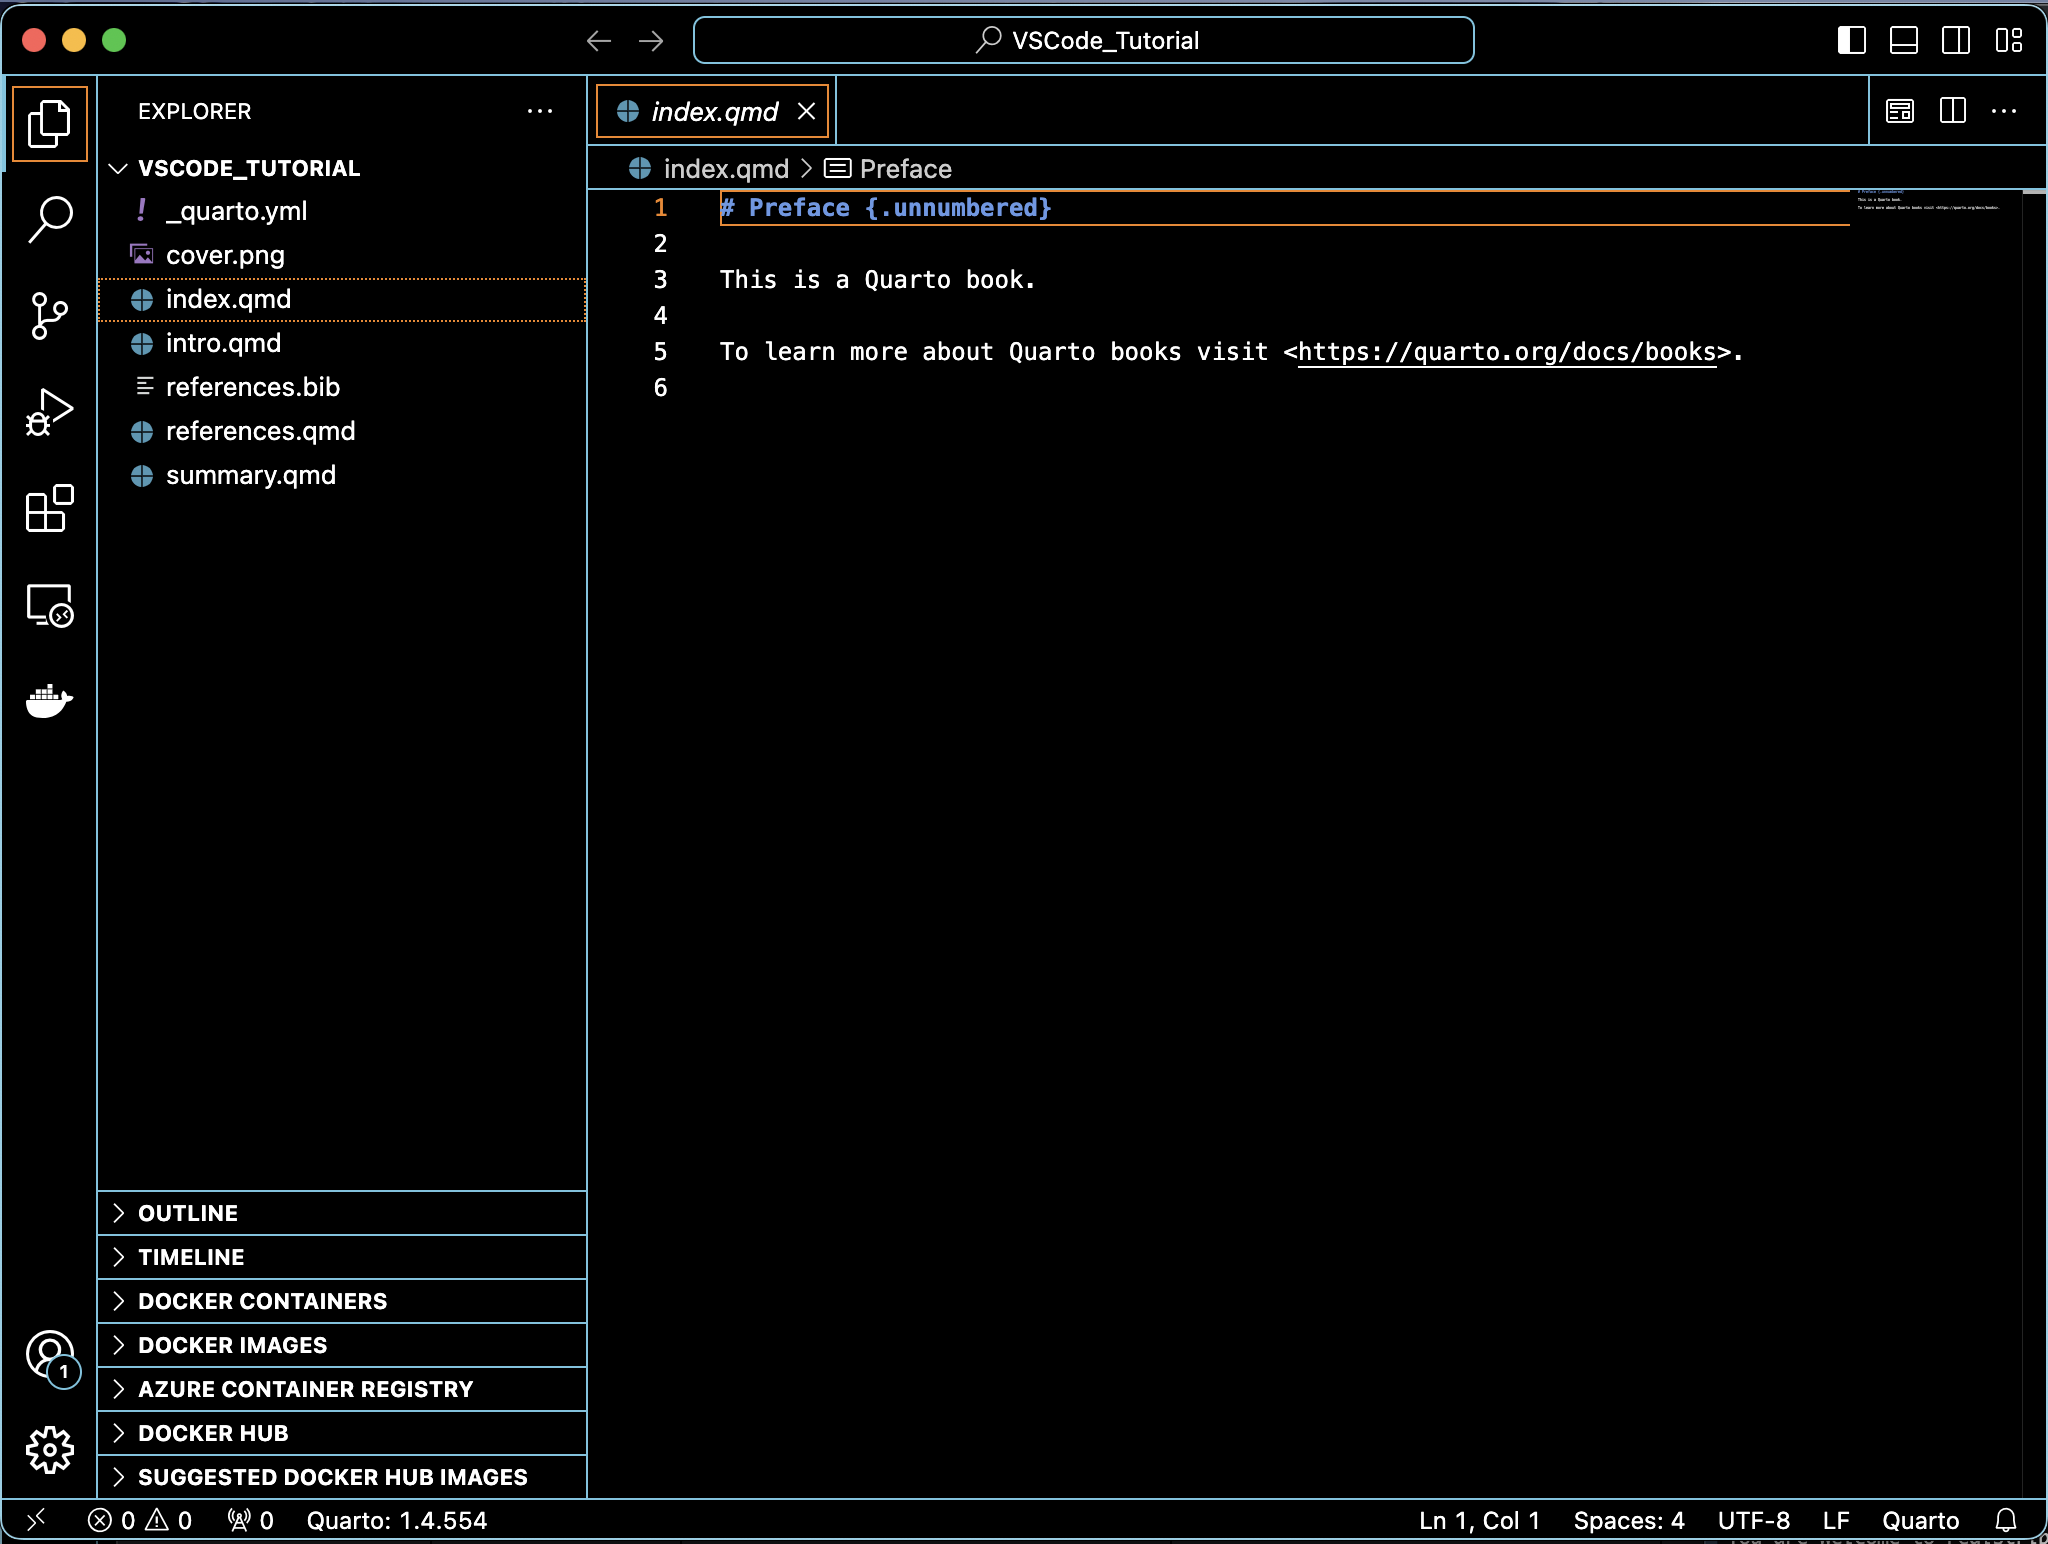
- You will see your Quarto Book project directory and automatically generated base files appear in the left panel in VS Code.
The panels in VS Code are customizable. Some key features are:
User interface
The VS Code user interface contains all of the necessary components to develop your code. Each component is described below.
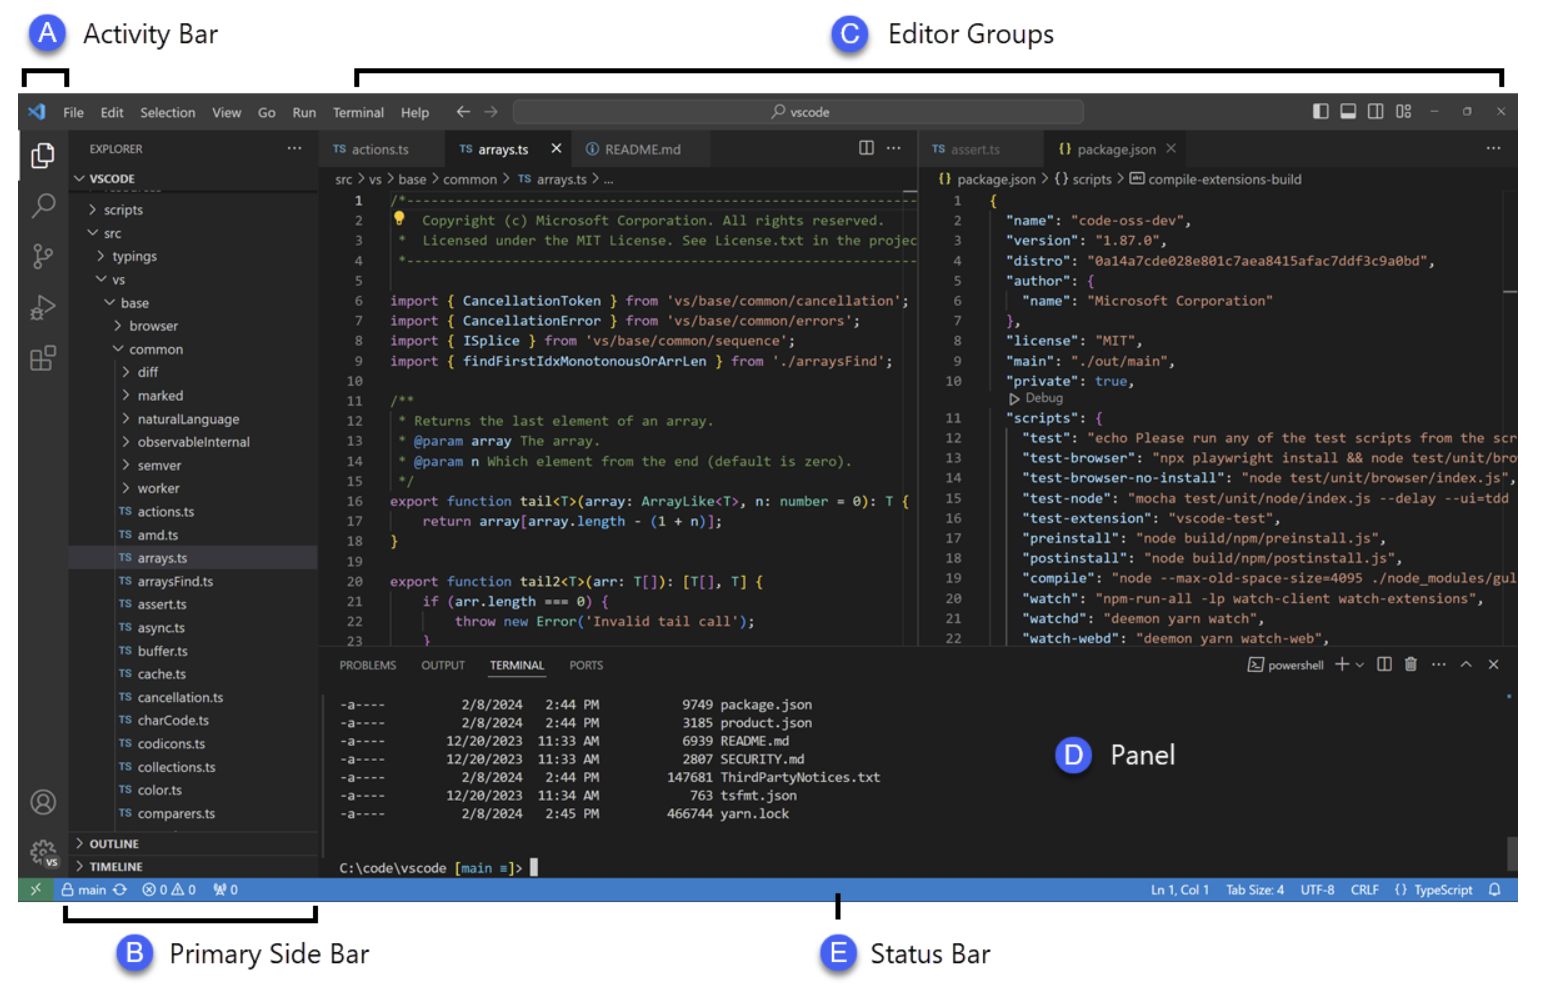 Activity Bar
Controls the view of the Primary Side Bar and houses extensions.
Primary Side Bar
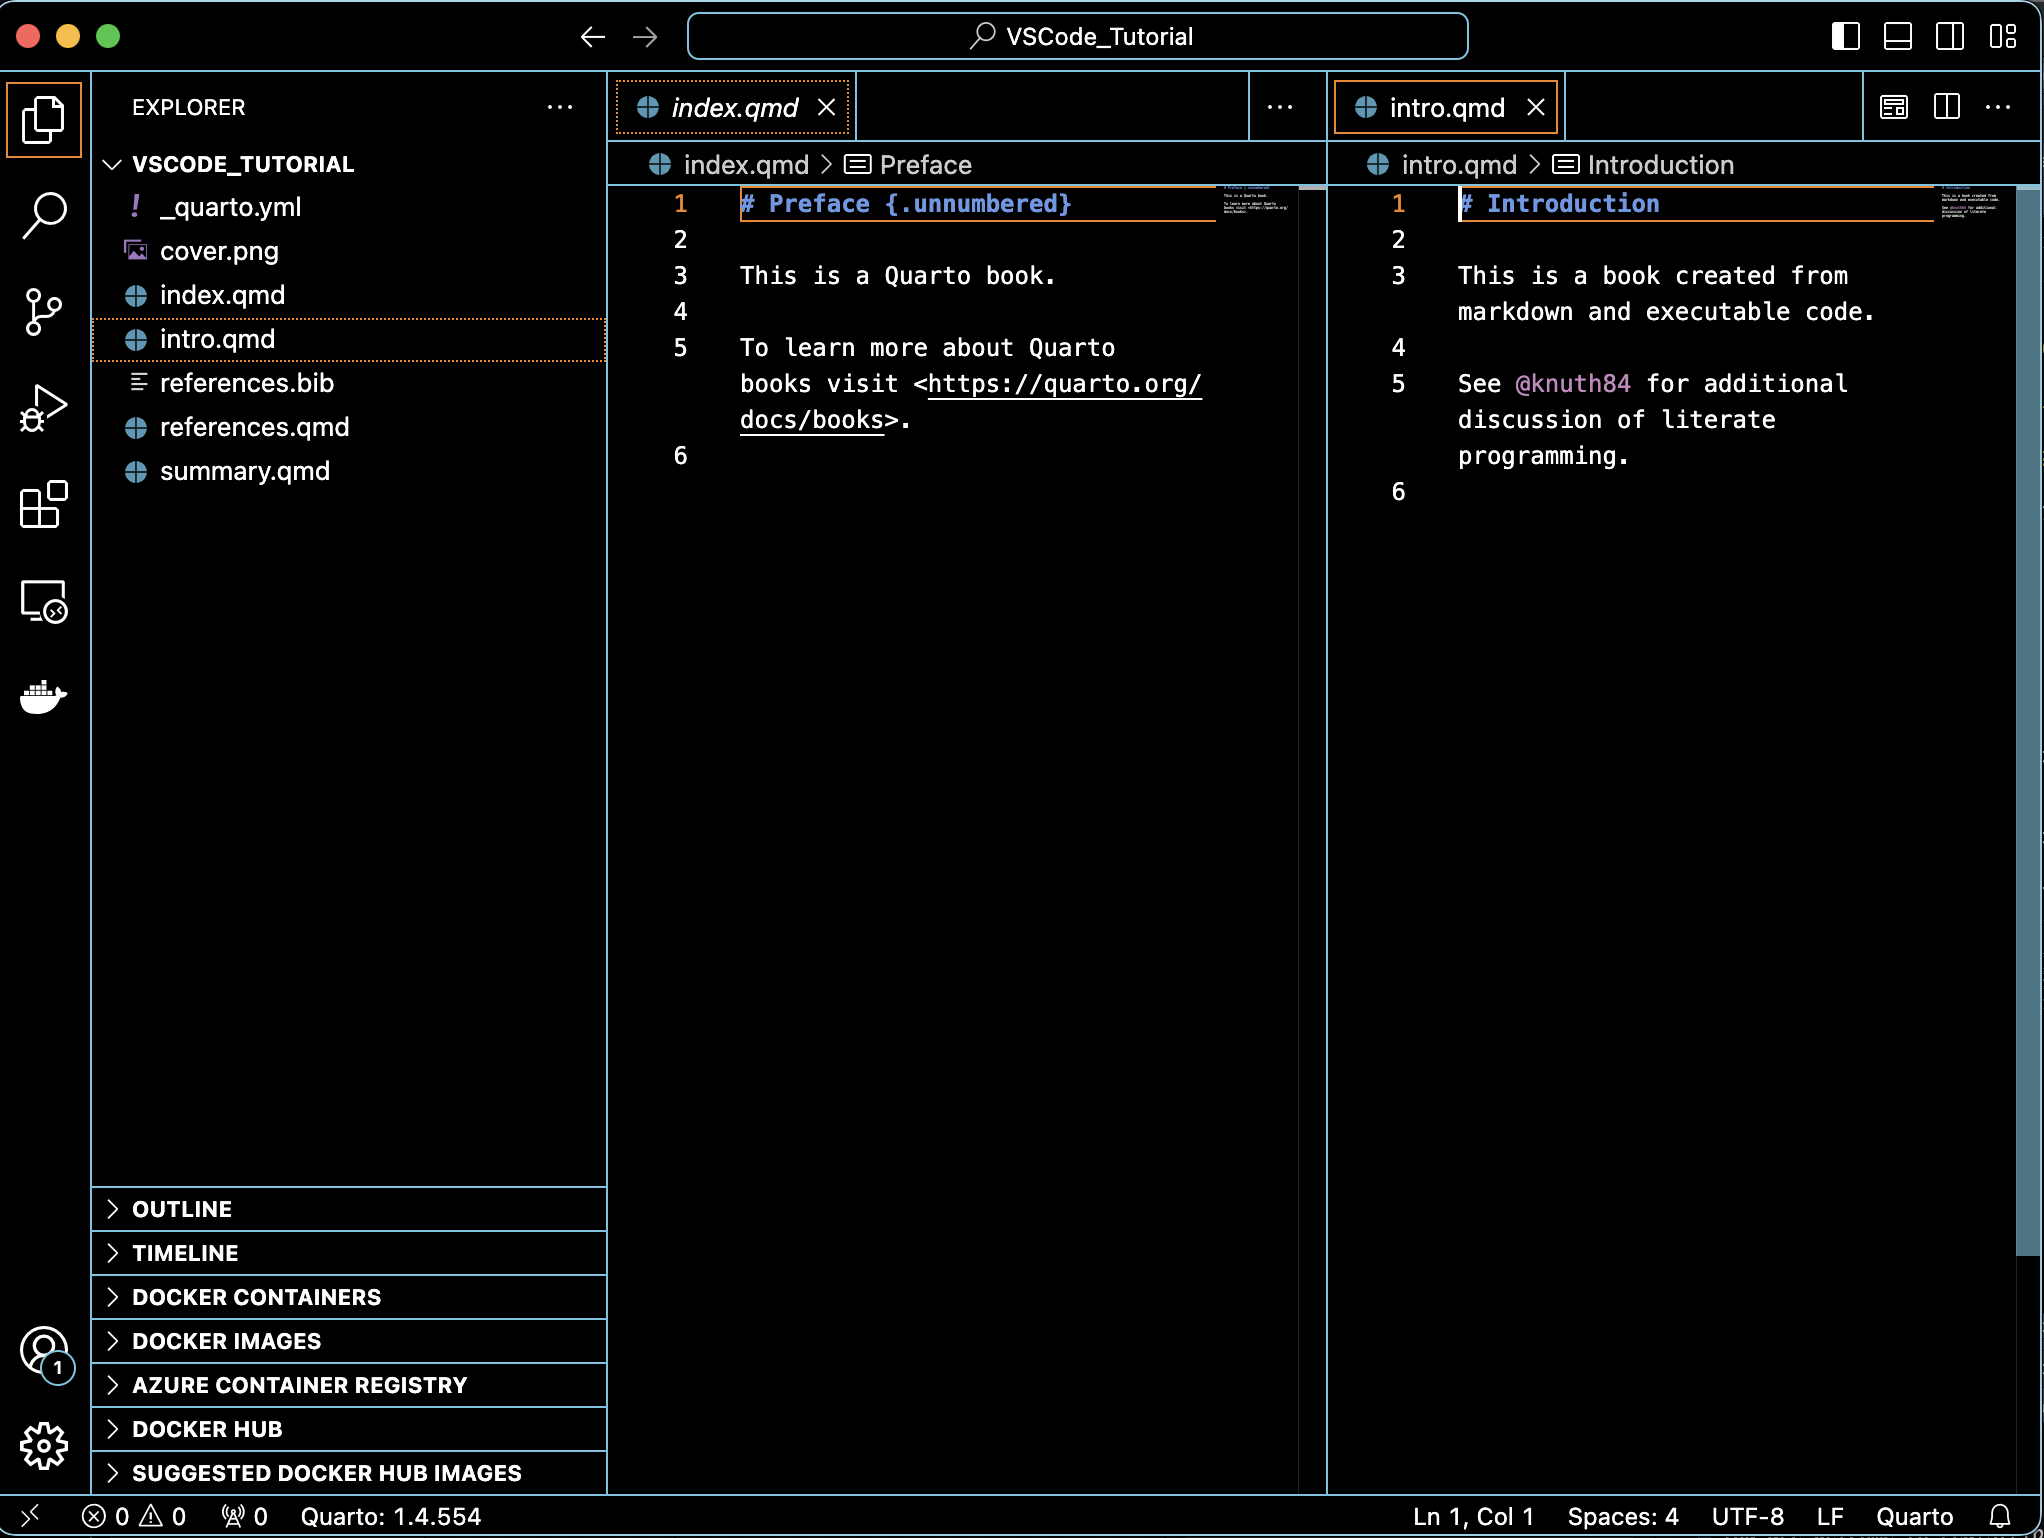
What you see here will depend on what you have selected from the Activity Bar. We often have this set to “Explorer” which shows you the files within your directory and project. The Explorer pane can also show your outline, timeline, containers, etc that are relevant for the open project. These are all collapsable.
You can also use the Activity Bar to open a Search tool, Source Control, Debugging tool, Extensions, Remote Explorer (i.e. GitHub Codespaces), or Containers in the Primary Side Bar.
Editor
This is where you do your work. Like the scripts panel in RStudio, this is where you will open and edit files.
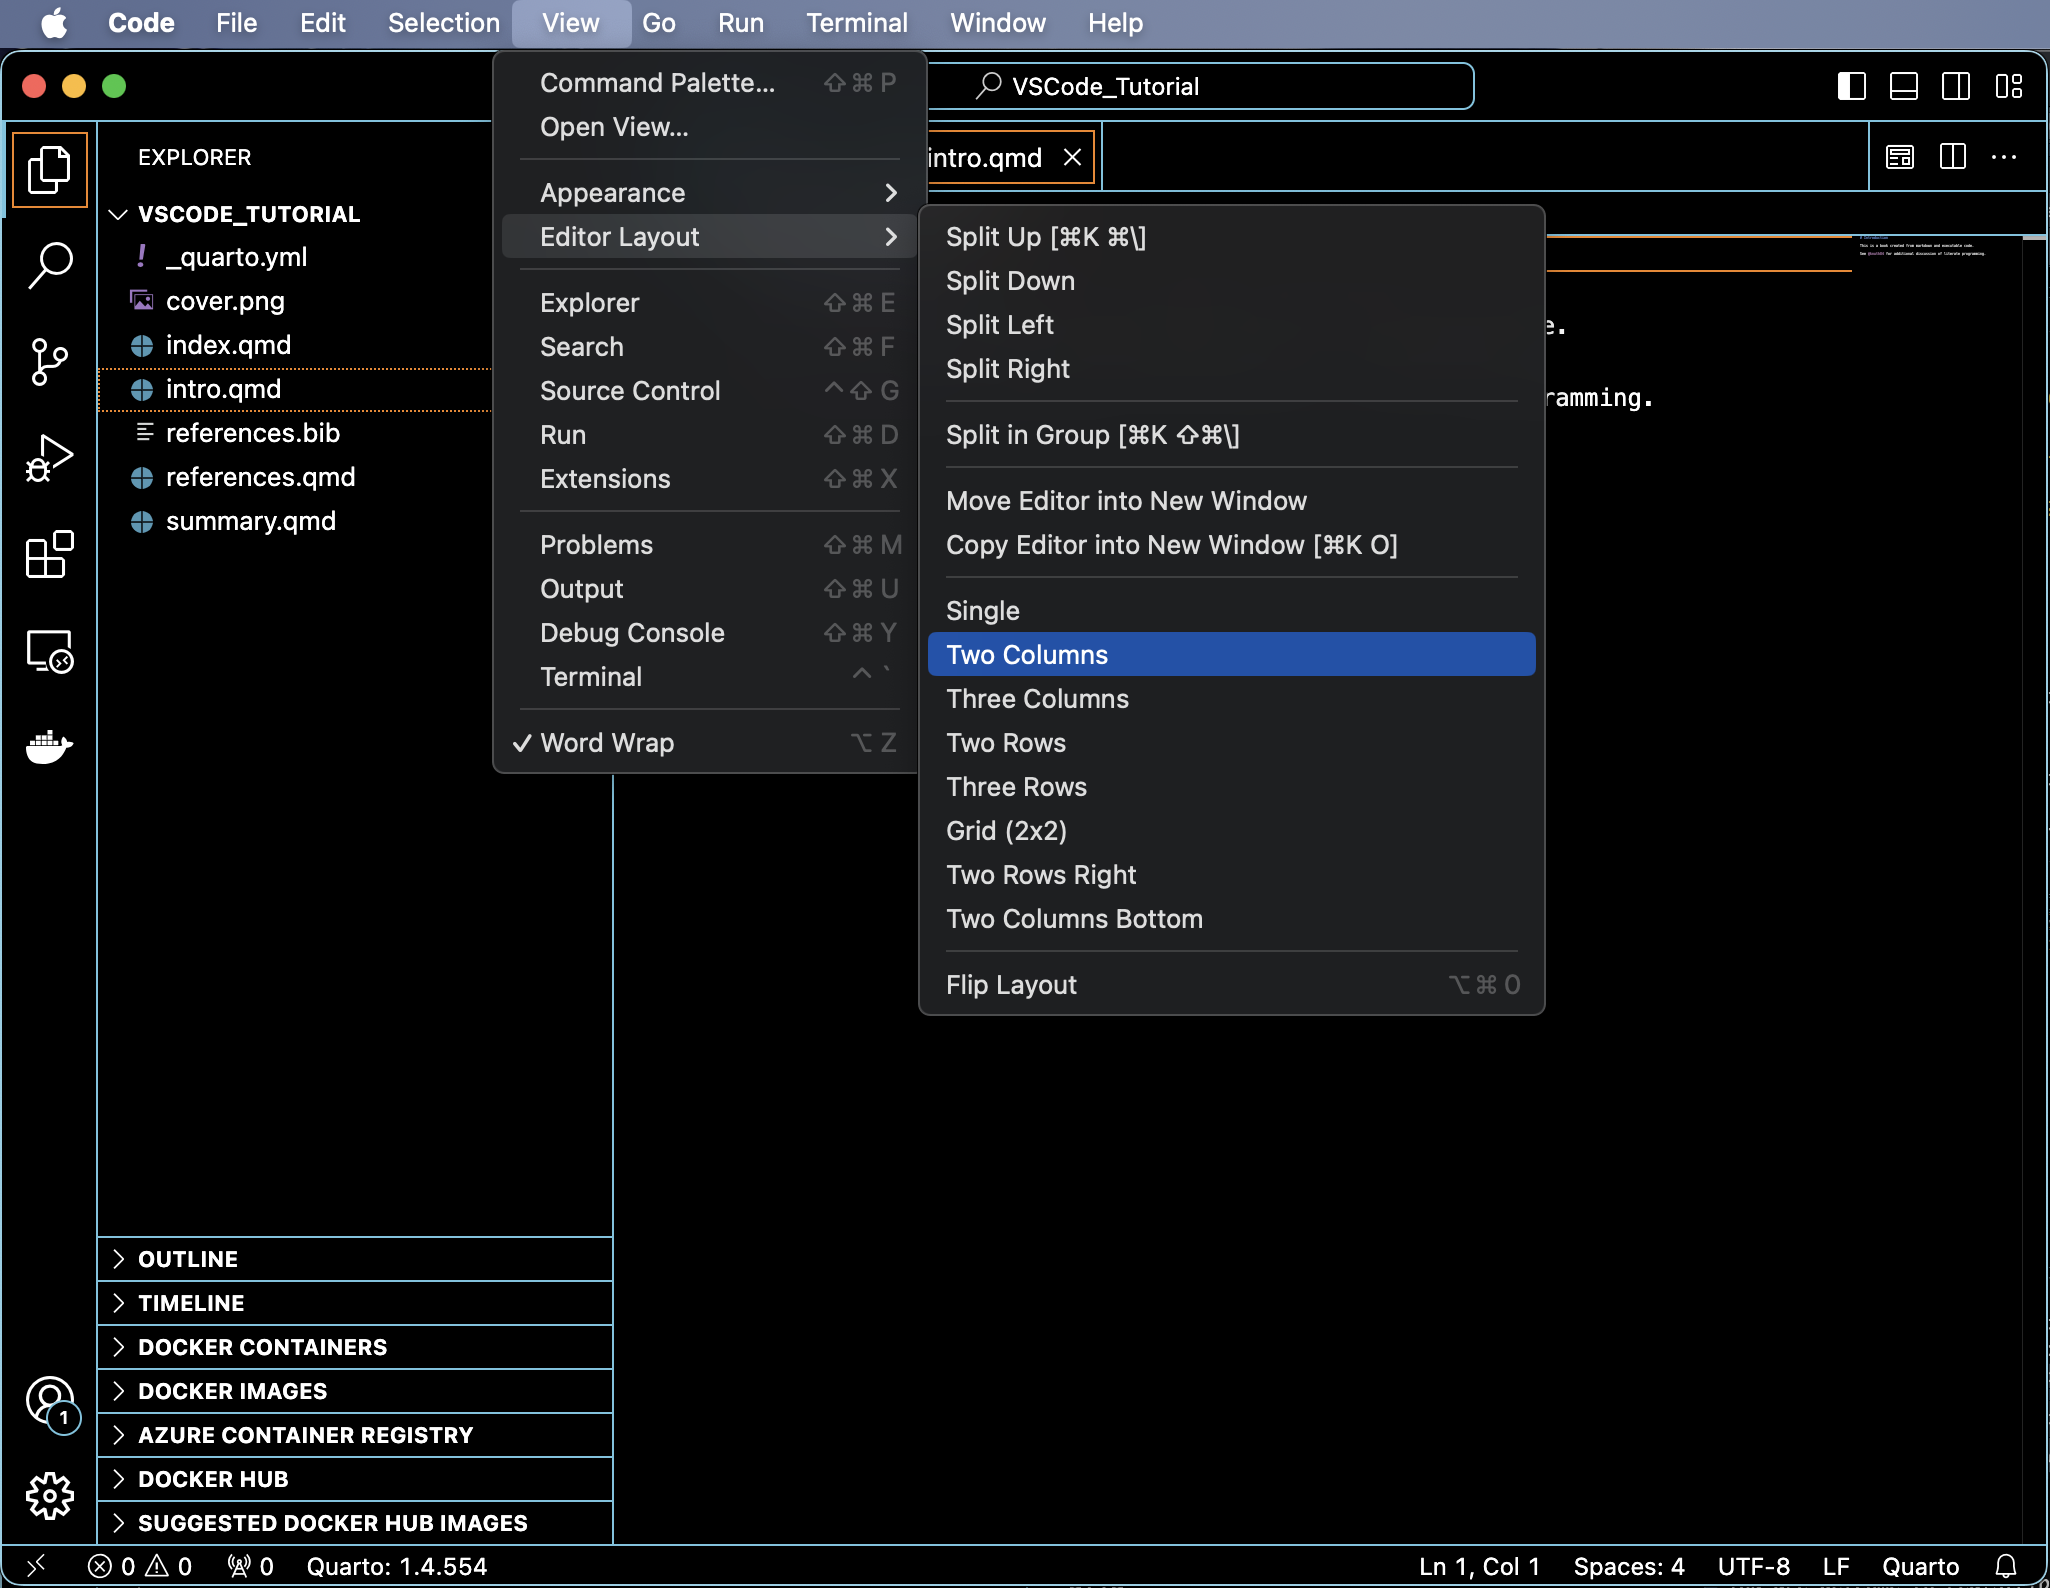
- Multiple panels - Change the Editor Layout from the "View" tab or from the four icons on the top right of the VS Code window to view multiple files simultaneously. Editors can be split vertically or horizontally.
Panel
This is a versatile additional space where you can run code from the command line, view debugging information, background jobs etc. Importantly, this is where you can access your Terminal directly within VS Code. We will discuss this in further detail below.
Status Bar
The Status Bar provides information about the open files and project, status of git-controlled repositories, and information on if scripts are currently being run.
9.1.3 Install Extensions
When you first install VS Code, you should have no extensions. As different code will require different extensions, you will customize you list of installed extensions as you develop. You can explore available extensions directly from the VS Code Extensions pane, or you can browse the VS Code Marketplace. If you start a script that requires a certain extension, VS Code will prompt you to install it. However, there are some basic extensions that most users will need.
To install an extension, simply click on the Extensions icon from the Activity Bar and search for your needed extension or choose from the list of recommended extensions. When you click on a desired extension it will display associated documentation in your Editor. Click “Install” and check that it appears in your “Installed” section in the Extensions pane.
Some recommended extensions are below. We have provided links to the documentation on VS Code Marketplace so you can read about these while you are in the process of setting up VS Code on your machine, but we recommend that eventually you install these directly in VS Code desktop, rather than from the links provided here:
There are also some extensions dedicated to debugging which you may find useful, such as R Debugger.
Use the Extensions pane to manage and uninstall extensions as needed.
9.1.4 Manage files
To manage the files in your directory, you do not have to exit VS Code and manage files from your standard file finder. The Explorer pane in your Primary Side Bar can serve as a file finder and manager.
To rename a file in Explorer:
- Right click the file and rename
To delete a file from Explorer:
- Right click the file and delete
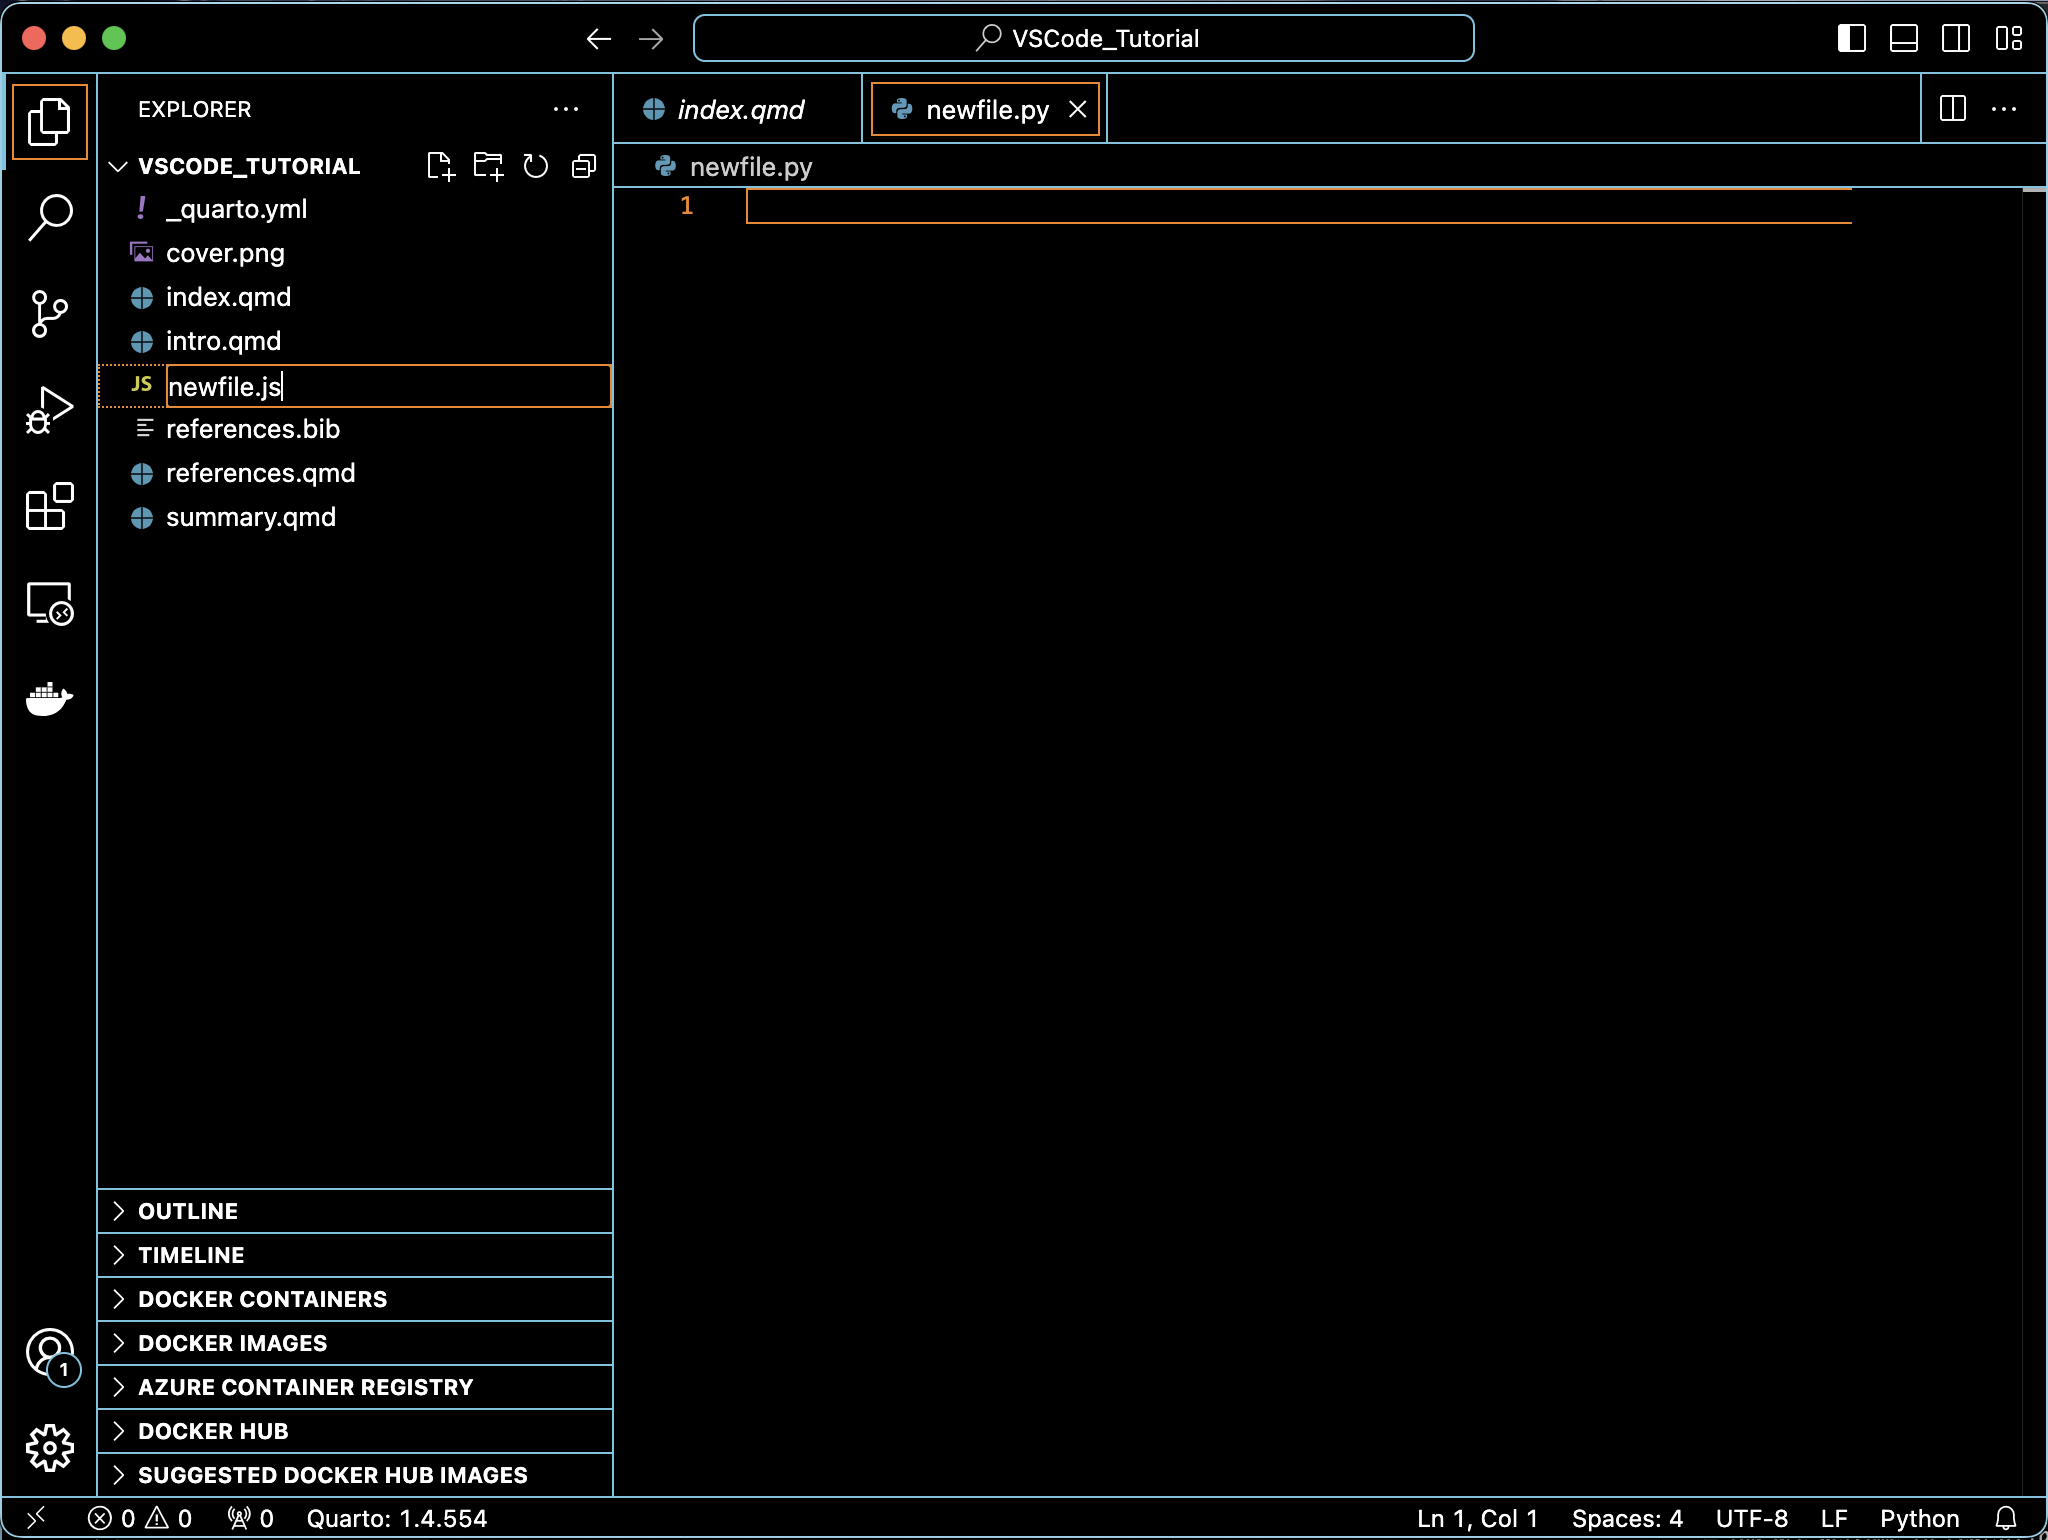
To change the file type in Explorer:
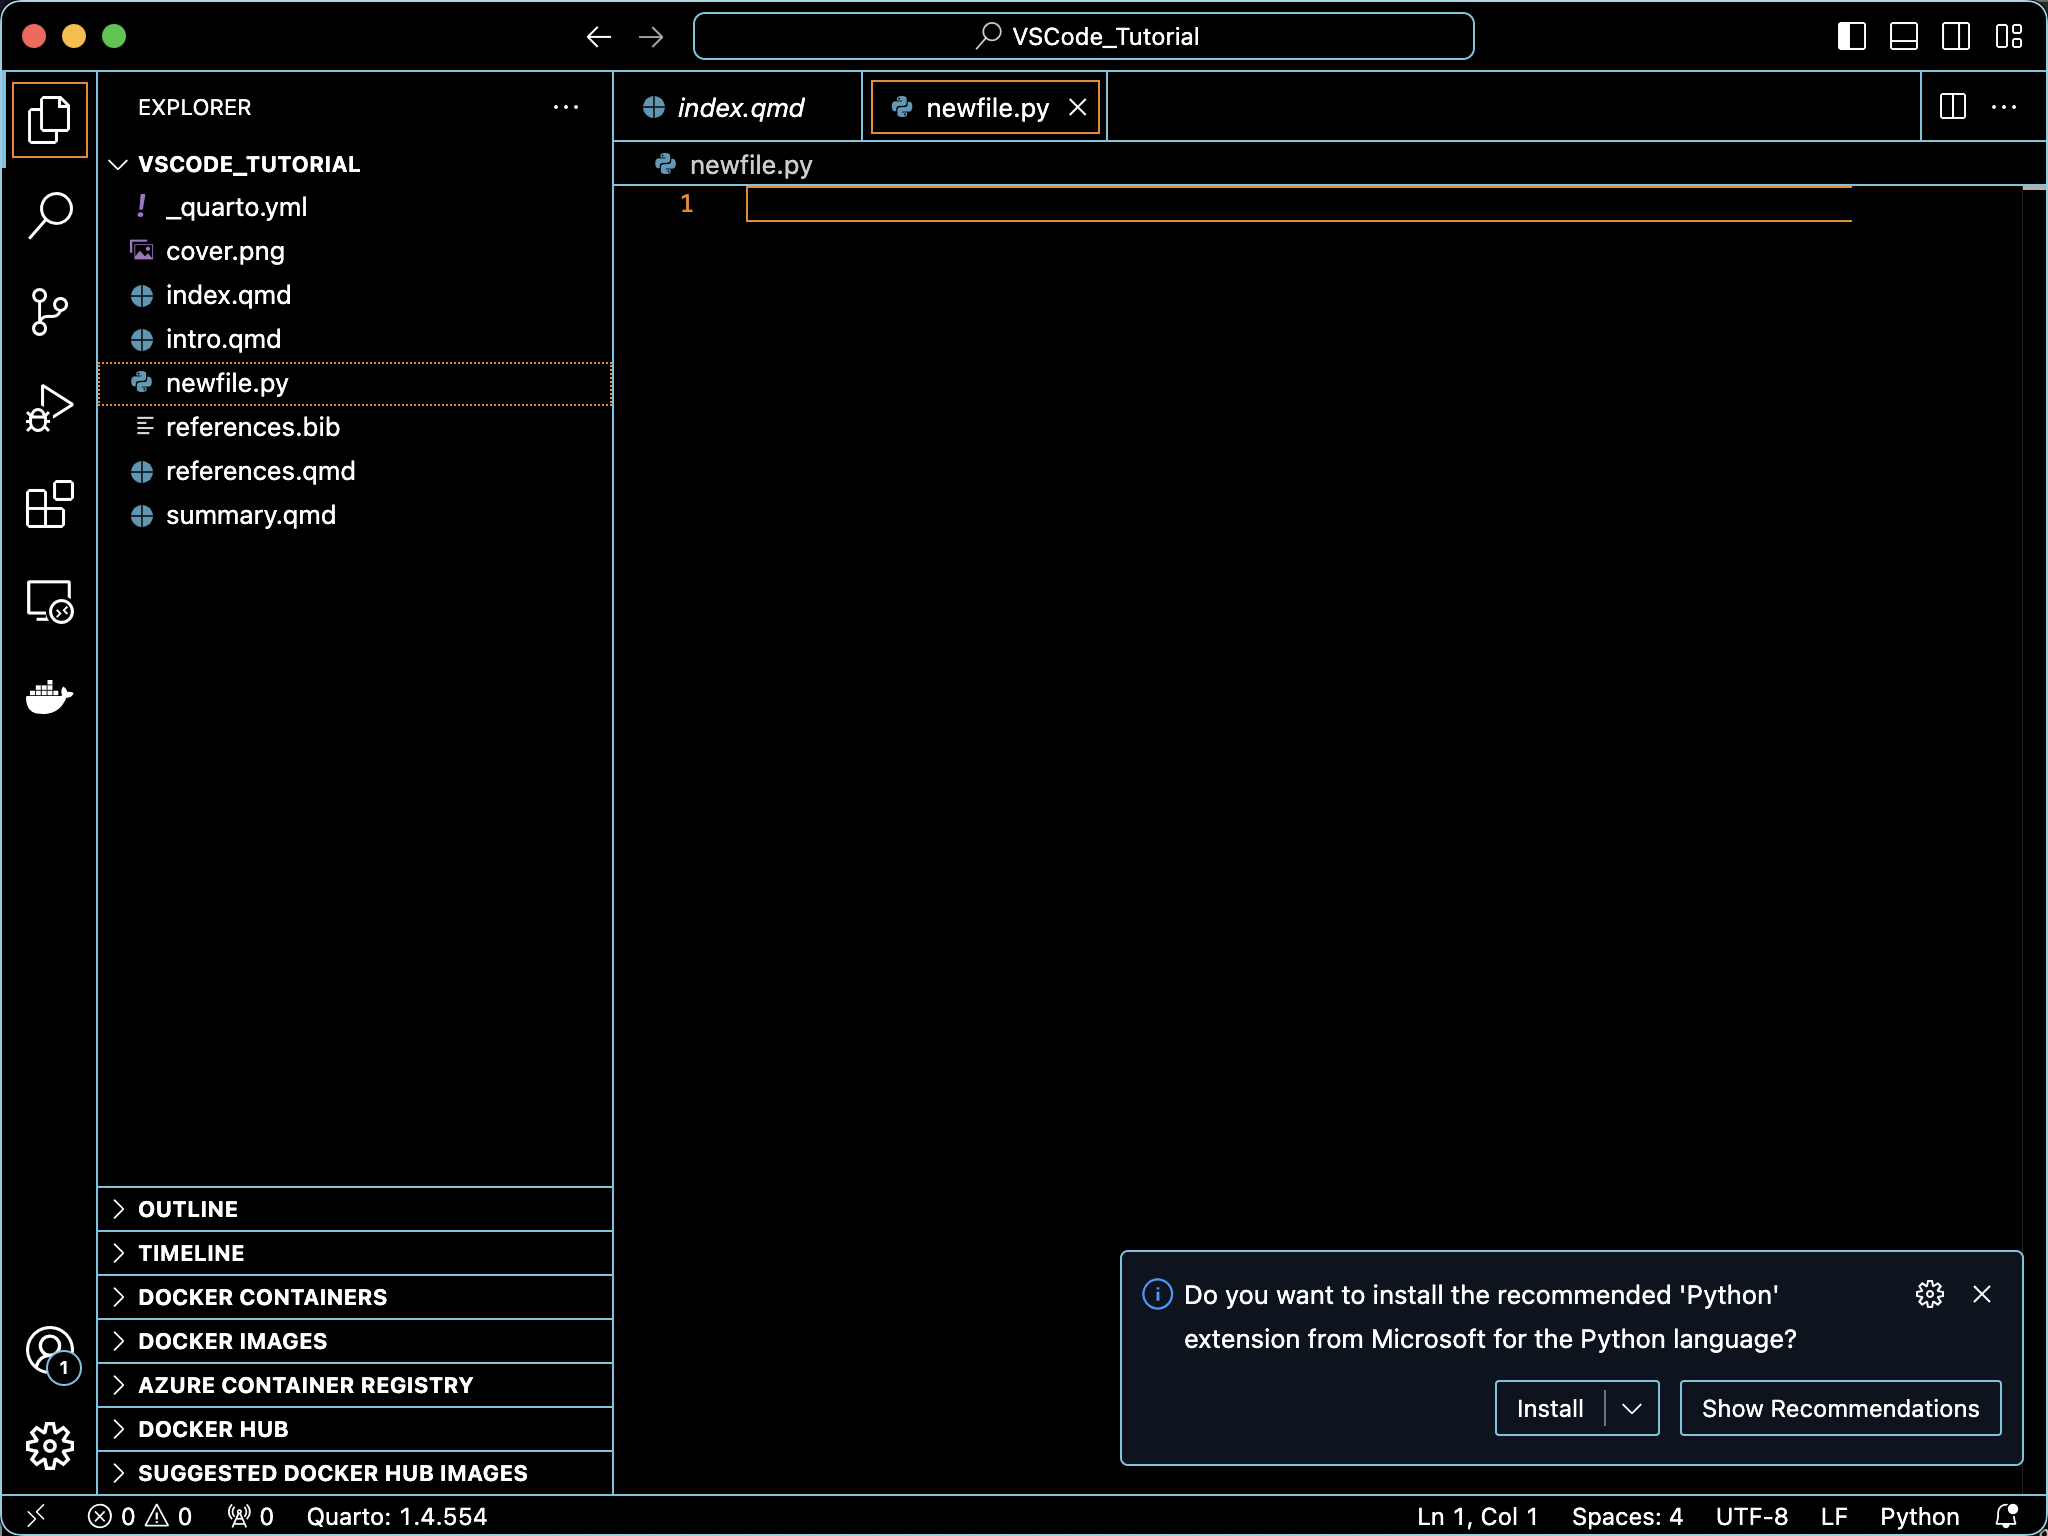
- Right click and change the file extension. For example if you create a new Python file called newfile.py, but actually wanted it to be JavaScript, you can just change the file extension to .js.
Notice that if you try to create a new file that needs a certain extension to run, VS Code will prompt you to install the recommended extensions.
 ## Initialize Git
One major benefit of using VS Code is that it enables integration of your code editor and terminal, streamlining the process for initializing and managing git-controlled projects.
Let’s use what we learned from the last session to initialize git for our current directory from VS Code.
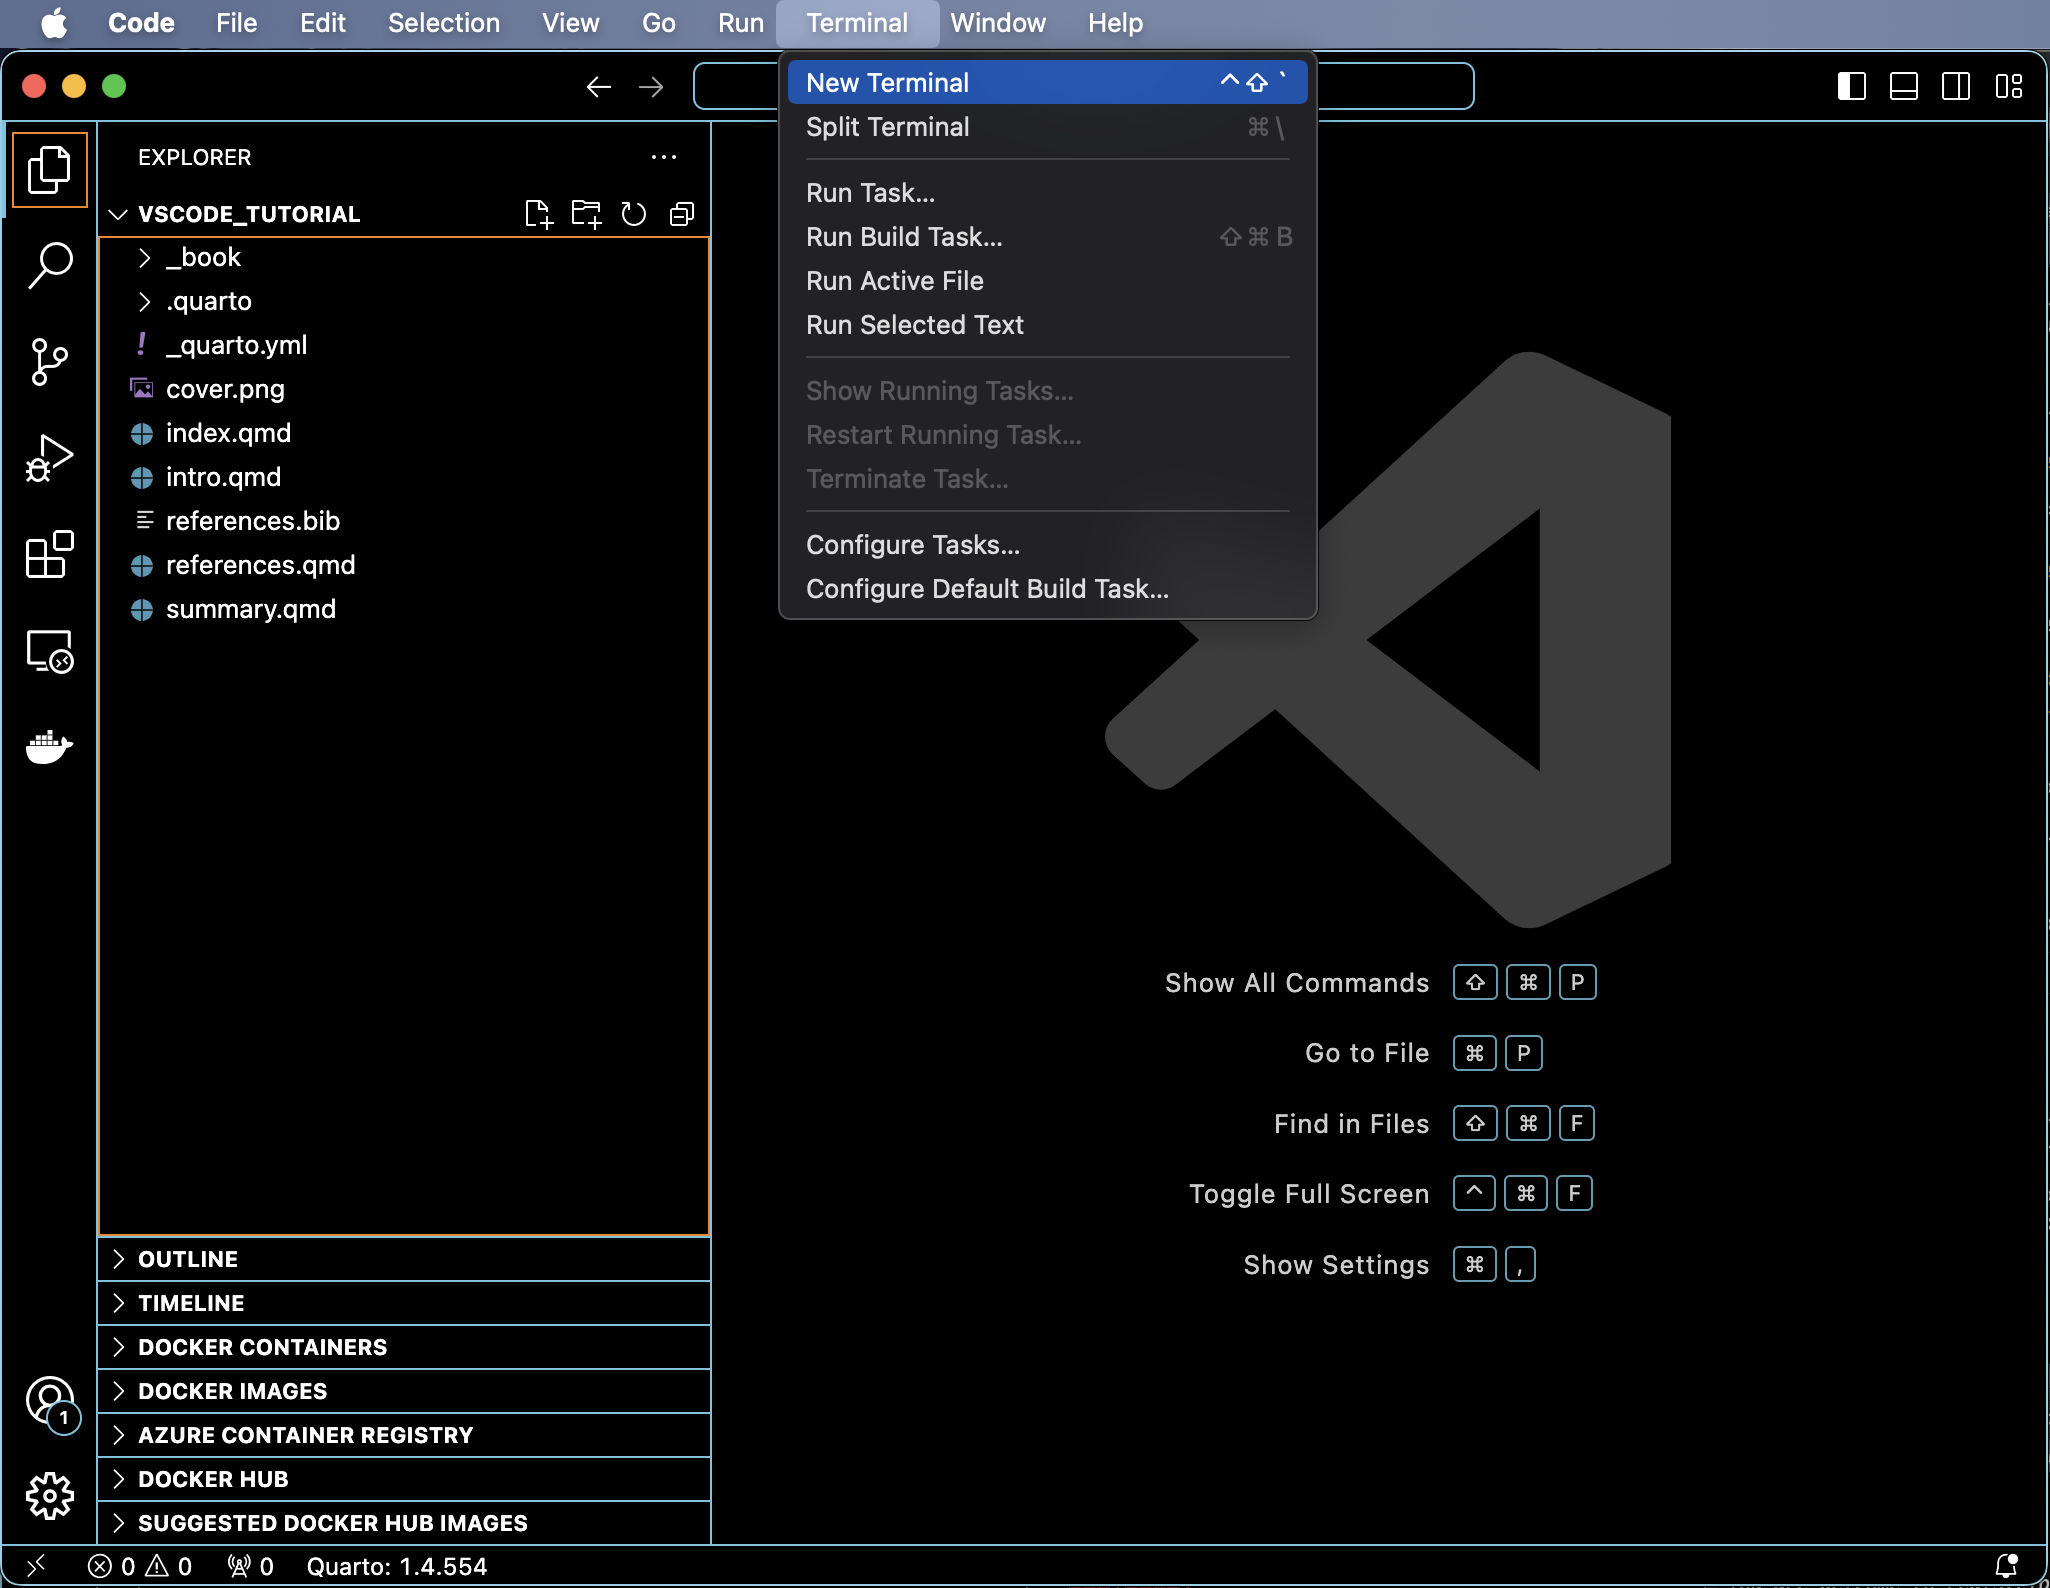
- Open a new Terminal in your VS Code panel.
- Follow the steps from our session on git and GitHub to initialize git on the project repository, add all files to the staging area, commit, and push to GitHub.
9.2 Code
You can now add and edit your files however you like! Add and edit files, just remember to continue to commit and push as you go. Let’s create a simple .qmd file with the code below and save it as a new file to our repository:
9.2.1 Clear environment
ls()
rm(list=ls())
9.2.2 Set output directory
dir.create("output")
dir_save <- "output/"
9.2.3 Load libraries
library(dplyr)
library(tidyverse)
9.2.4 Load dataset
We will load the built-in “iris” R dataset and examine structure.
data("iris")
head(iris)
Sepal.Length Sepal.Width Petal.Length Petal.Width Species
1 5.1 3.5 1.4 0.2 setosa
2 4.9 3.0 1.4 0.2 setosa
3 4.7 3.2 1.3 0.2 setosa
4 4.6 3.1 1.5 0.2 setosa
5 5.0 3.6 1.4 0.2 setosa
6 5.4 3.9 1.7 0.4 setosa9.2.5 Plot data and export
ggplot(data = iris,
                mapping = aes(x = Sepal.Length, y = Petal.Length)) +
  geom_point(aes(color = Petal.Width)) +
  geom_smooth(method="lm") +
  labs(title = "Petal vs. Sepal Length", subtitle = "Separated by Species", x = "Sepal Length", y = "Petal Length") +
  facet_wrap(~Species,
             scales = "free_x") +
  theme(plot.title = element_text(face = "bold"))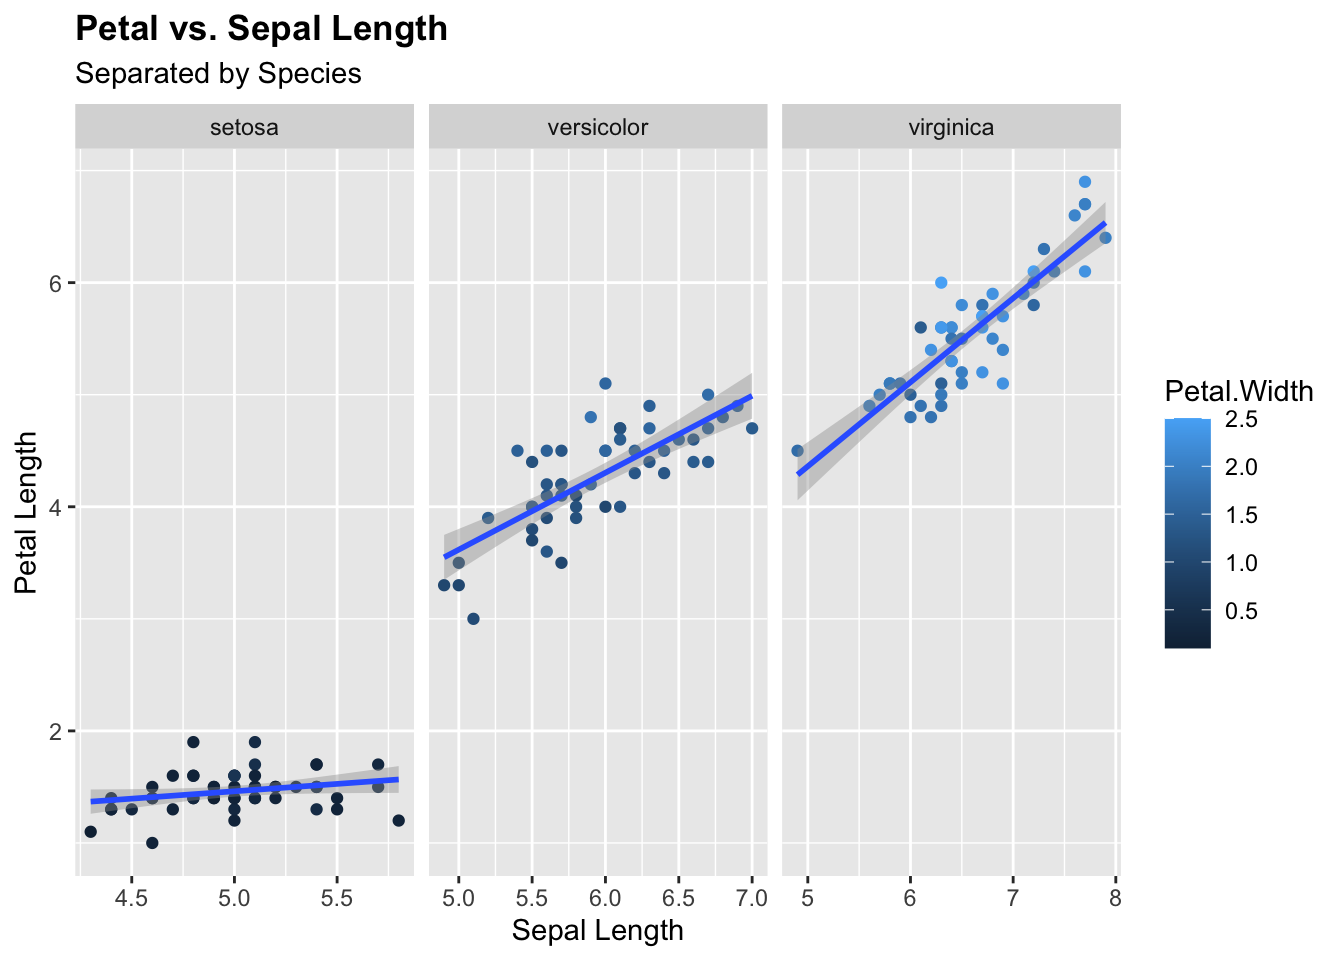
ggsave("output/iris_ggplot.pdf", width = 7, height = 7)
ggsave("output/iris_ggplot.png", width = 7, height = 7)
ggsave("output/iris_ggplot.jpeg", width = 7, height = 7)
Render the .qmd file.
9.3 Debugging
One of the key features VS Code supports is debugging. VS Code has a built in debugger that is compatible with JavaScript and TypeScript, but for other languages, you, like R, you will need to install an extension to help debug the code. For R, the debugging extension is R Debugger.
Follow the instructions in the README.md to install and deploy R Debugger.
Briefly:
Install R Debugger extension in VS Code.
Install R package vsDebugger().
devtools::install_github("ManuelHentschel/vscDebugger")Open you R file in the VS Code editor pane.
Click the debugger from the Activity Panel so it opens in the Primary Sidebar.
Click F5 or the “Launch” button in the Debugger Activity Sidebar.
- You may also want to open the DEBUG CONSOLE in your panel.
Click F5 or “Continue” to debug your code.
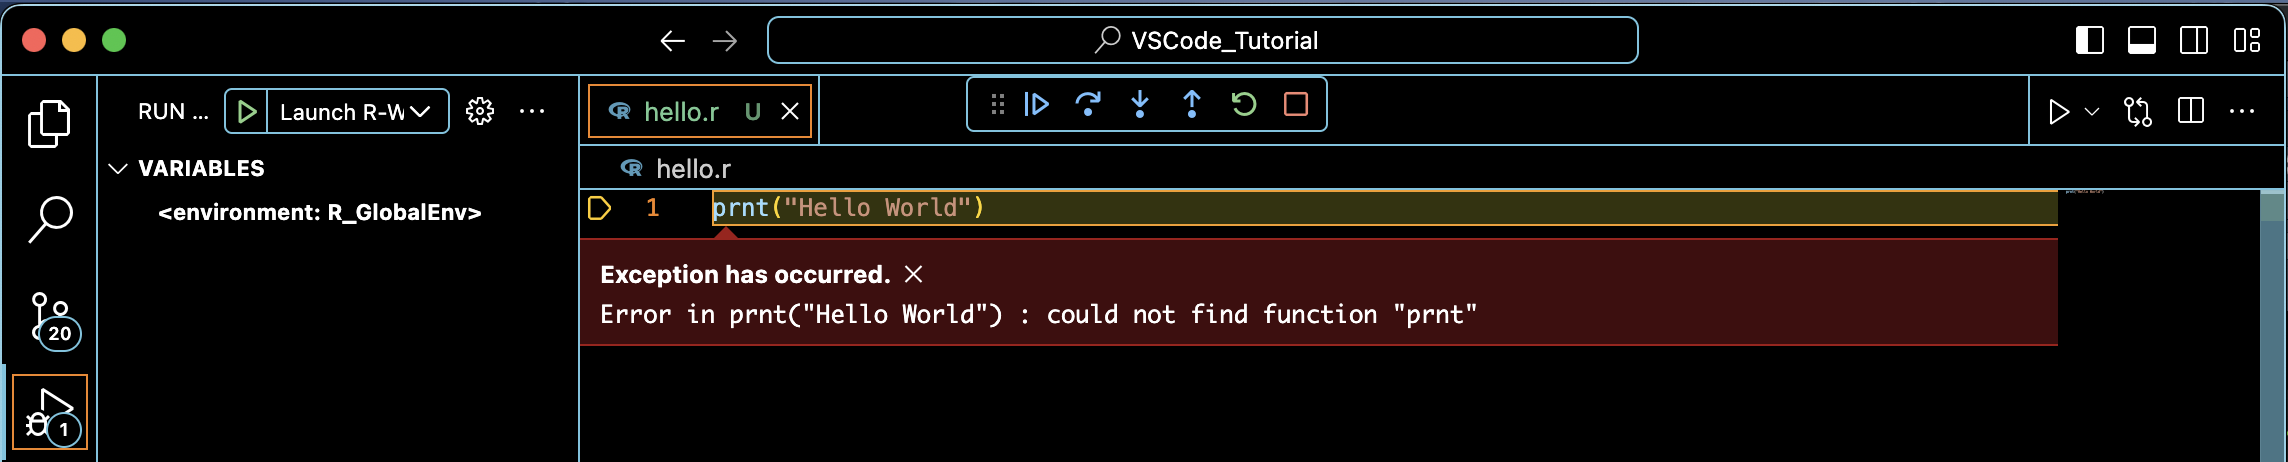
Let’s try with a very simple example. Create a simple R script in your open directory:
print("Hello World")Run the code to make sure it works. Then introduce an intentional error:
prnt("Hello World")Now launch R Debugger and view the errors. You should see that R Debugger has identified the issue so you can fix it:
VS Code also supports extensions for AI assistants that can help debug code as you work, such as GitHub Copilot:
GitHub Copilot allows you to interface with a ChatGPT-like AI tool to help with your code as you develop. It is a paid extension, but there is a free trial.
9.4 Cheatsheets
9.5 Homework
- Download and install VS Code.
- Play around VS Code.
- Edit your git-controlled repository, commit, and push to GitHub, all within VS Code.